
Todd in NY
-
Posts
2,483 -
Joined
-
Last visited
Content Type
Profiles
Forums
Events
Gallery
Store
Everything posted by Todd in NY
-
I launched on eastern Lake O this past Saturday and I can't believe how low the water is. Is Lake Erie As Low as Lake O, or worse?
-
Rod holders and rigger mount location - Sylvan Offshore
Todd in NY replied to The force's topic in This Old Boat
 That location should work for net storage. Whether you choose a tube type or flush gunnel mount is up to you. A net can sway back and forth in heavier seas, which can put a lot of stress on the gunnel. Also, the net catches all kinds of wind, which can blow the net material into any rods that might be nearby. A flush through-gunnel mount might be more stable, and easier to pull the net out of. Again, maybe try different types of tube holders on other boats to see which one you think will best fit your liking.
 -
Check your boat owners manual, or the motor owners manual. I believe my 1989 Evinrude 150 owners manual says to trim the motor all the way up, engage the motor bracket, then lower the motor to rest on the bracket for towing the boat.
-
Rod holders and rigger mount location - Sylvan Offshore
Todd in NY replied to The force's topic in This Old Boat
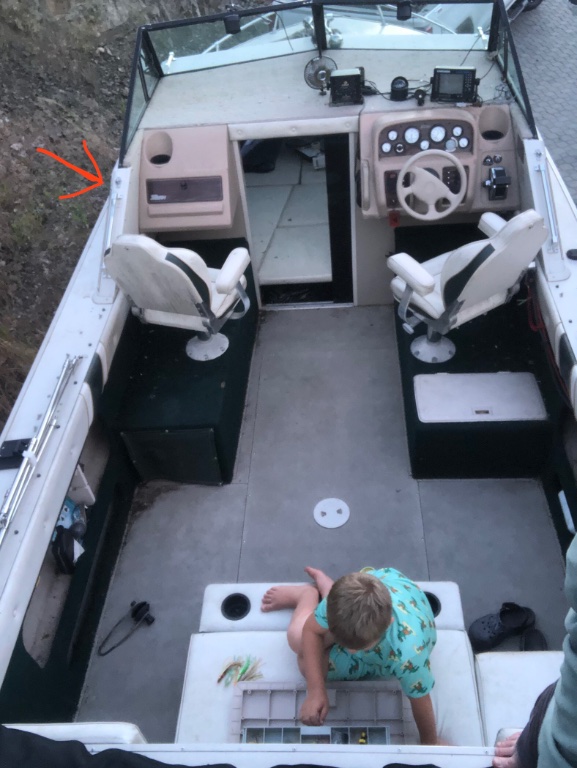
I took a picture of my interior, to show the differences between my Crestliner and your Sylvan. I have an outboard, so I don't have vents. My dual rod holders are 36" forward of my transom "tray" (the red line) that holds my rigger weights, dipsy divers, etc. My step stool is in the only place that it can fit because of the rod holders in my gunwales. The step stool folds up and gets stowed away between the cooler and the transom while fishing. The step stool can be used on either side on the boat, depending which side the dock is on. There's plenty of room between the cooler and the gunwales. If I'm messing with a rigger when the dipsy rod fires, someone else can grab the dipsy rod and fight the fish with us not being in each other's way. I run my riggers out to the sides, 90 degrees or 45 degrees depending on the current, so I have some distance between my rigger rods and dipsy rods. -
Installing a Lowrance Outboard (Auto) Pilot - COMPLETE
Todd in NY replied to Todd in NY's topic in This Old Boat
 Thanks, @The force! The Lowrance outboard cable steer autopilot went up about $350 in the last 3 or 4 years, so I figured I needed to stop dragging my feet and buy one before they get any more expensive. I'm waiting for the wind and weather to cooperate on my days off so I put the AP through it's paces. I have a Terrova on my 16ft row boat, and I love it! I took that boat to a whole new level. I did a writeup on that install in "this old boat" sub forum.
 -
Installing a Lowrance Outboard (Auto) Pilot - COMPLETE
Todd in NY replied to Todd in NY's topic in This Old Boat
Thanks Brian! I have fished on a couple of boats that have autopilot, and I know it's a game changer, especially when there are only two people on the boat. I wanted to keep this project on the easy side, so I never considered converting it to hydraulic steering. That sounds like a lot more work. -
Rod holders and rigger mount location - Sylvan Offshore
Todd in NY replied to The force's topic in This Old Boat
For salmon, I run 2 downriggers (1 on each side, sometimes with a stacker setup with 2 rods per rigger), and only 1 dipsy per side. My vertical triple rod holders are for running inline boards for walleye. I don't usually run more than 3 lines per side for any type of fishing. -
Rod holders and rigger mount location - Sylvan Offshore
Todd in NY replied to The force's topic in This Old Boat
Try to fish on a few boats that are set up differently. Then you will have a better idea of what might work for you. There are so many right ways to set up your boat, as long as it's right for you. -
Rod holders and rigger mount location - Sylvan Offshore
Todd in NY replied to The force's topic in This Old Boat
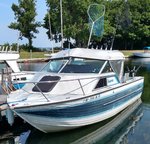
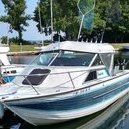
This is my 22ft Crestliner Sabre. The dual rod holders on the gunwales are for dipsy driver rods or whatever. The vertical triple rod holders are for inline boards, then there is a dual rod holder on the stern between the downriggers that I use for a flat line (folded down in this pic). I troll for salmon, trout and walleye with this boat, and I wouldn't change the setup. This is my 3rd Lake Ontario trolling boat, and this is as close to perfect as I can get without spending a fortune on rod holders. Click on the picture to enlarge it -
Boat Re-wired & Other Repairs, Before & After
Todd in NY replied to Todd in NY's topic in This Old Boat
 My 33 year old Evinrude 150 (1989) finally got a new starter and solenoid yesterday. Now it fires up real fast, instead of taking longer to crank over like it did before. I think it was the original factory starter and solenoid I removed yesterday. I installed a Lowrance Outboard Pilot cable steer pack earlier this week, as well as a new Teleflex steering cable. I also put a new prop on my 1991 Evinrude 15hp kicker motor. The new prop is a 9.25 x 8 pitch 3 blade Solis. The prop I removed was a 3 blade 9.5 x 10 pitch. My goal is to increase ROM without increasing speed. I need the extra RPM to help charge the batteries better, especially when using the autopilot.
 -
Installing a Lowrance Outboard (Auto) Pilot - COMPLETE
Todd in NY replied to Todd in NY's topic in This Old Boat
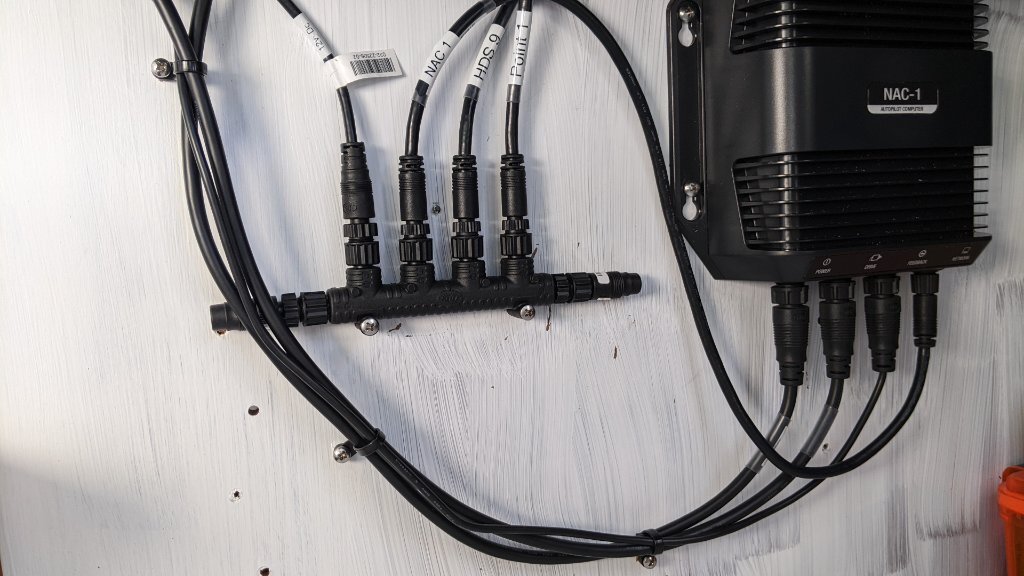
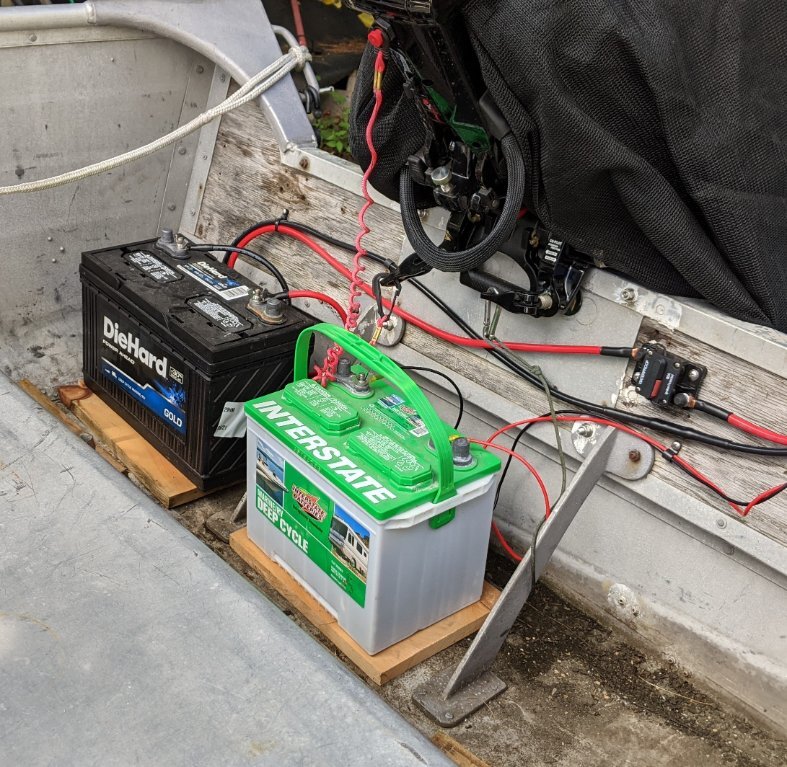
Let me say that the installation instructions that came with my autopilot were as bare bones as could be. It required a lot of guess work in some situations. The next step was to commission the AP (autopilot). These instructions are only found on a YouTube video. My system was working. But my HDS-9 didn't recognize the autopilot (AP) or the NAC-1 computer. Everything was powered on. I watched several videos to try to figure out what was wrong. I also checked the Lowrance web site. That made things more confusing... This is the wiring diagram that came with my AP. This is the wiring diagram that Lowrance has on it's web site. There are NO similarities. So which one is correct? Frustrated, I go back out to my boat to double check my wiring. I chose to use the wiring diagram that came with my AP. That's when I noticed it. Can you see it? Of course you can't. Because none of the wiring diagrams mention the two "extra" caps that go on the ends of the NMEA 2000 hub. The printed diagram has a capital T next to them. The web site diagram shows them in red. That's it! The 2 "extra" caps, that aren't mentioned in the instructions, need to be attached to the ends of the NMEA 2000 hub. So I added them and tried the commissioning sequence again. Now it works like a champ. I've never used any NMEA systems before, so I had no idea how those NMEA hubs need to be hooked up. The dockside commissioning is complete. That concludes this installation. Now I have to get the boat on rhe lake and run the AP through it's paces. Thanks for following, and tight lines! -
Installing a Lowrance Outboard (Auto) Pilot - COMPLETE
Todd in NY replied to Todd in NY's topic in This Old Boat
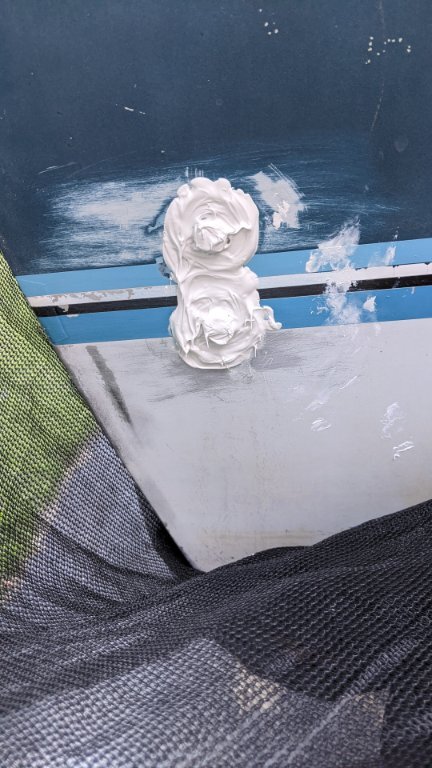
Knowing the steering cable was listed as "out for delivery" on a UPS truck, I put the blue plastic conduit in place under the gunwale. I also put the steering wheel on, and put the plastic tube on the bottom of the helm. The conduit was completely hidden before I fed the steering cable through it. I noticed the sharp edges around the splashwell hole when I removed the old steering cable, so I put some car door edge trim around the hole. before after I used a 1" diameter brush to clean out the tilt tube. I pushed the brush through handle-first, wiped the brush with a clean rag, and repeated 2 more times. It worked like a champ. The hookouts are for size comparison. The steering cable arrived at 2pm. I uncoiled it inside the boat and fed the end with the plastic tube in through the splashwell hole. I guided it into the blue conduit and fed the cable all the way to the helm. Super easy, and no help was needed. Once I got the cable up to the helm, I pulled the conduit off the cable, removed the protective plastic sleeve, and began to feed the cable into the helm. This is the mess of wires under the helm that I had to navigate the steering cable through. It looks worse than it was. The steering cable is installed and secured inside the helm. Now it's time to install the other end inside the tilt tube. Next will be turning on the autopilot and HDS-9 to see if it works... -
Installing a Lowrance Outboard (Auto) Pilot - COMPLETE
Todd in NY replied to Todd in NY's topic in This Old Boat
The steering cable did not arrive today, but I installed the new helm, all of the accessories such as the NAC 1 and Point 1, all cables and wires. There is an access "panel" inside the cuddy cabin, that gives access to the helm wiring. I had to make that hole bigger for the new helm to fit through the hole. I used a jigsaw to make the cut, after drilling two 1/2" holes as pilot holes. But first, I had to unscrew the fuse block under the helm. Here is the new cutout. The cover will still hide the hole. That's the new helm in position. Next up is to route the cable for the Point 1 through the hardtop. I have a piece of 1" blue plastic electrical conduit that I bought almost 15 years ago. I forgot why I bought it, but it's been real handy for routing transducer cables and wiring through the boats that I've worked on. I used it again today for the Point 1 cable. It is smooth inside, so cords slide through it with no resistance. I'll use the blue conduit to install the steering cable, which should be here tomorrow. Next task was installing the wires and cables. The Point 1 on the hardtop Finished for now -
Installing a Lowrance Outboard (Auto) Pilot - COMPLETE
Todd in NY replied to Todd in NY's topic in This Old Boat
Absolutely! My new steering cable should arrive in the mail today. In the meantime, I'll install the helm and a few other parts. -
Installing a Lowrance Outboard (Auto) Pilot - COMPLETE
Todd in NY replied to Todd in NY's topic in This Old Boat
Tonight I decided to remove my old steering cable and helm. The helm is probably the original factory installed helm, it's an old Morse unit. But it worked just fine. Needless to say, removing the helm was much harder than I anticipated. I should've known better. I had to disassemble the helm in order to coax the cable out of it. But I eventually got both the helm and the steering cable removed. The old steering cable slides easily through it's jacket with light hand pressure, so it's still good enough to use on another boat. I'll clean this tube before I install the new cable The old helm The new helm came with a new mounting plate (the black one), so I switched that out tonight. I was planning to install the new helm tonight, but I need to remove some wood to make the access hole bigger on the cuddy cabin wall. The new helm is too long to fit in the same space that the old helm occupied. So that's all for tonight. -
I'm finally getting around to installing a Lowrance cable steer autopilot in my 1988 Crestliner Sabre. The boat is 22ft long, the main motor is a 1989 Evinrude 150, and the kicker motor is a 1991 Evinrude 15. The boat does not have hydraulic steering, which is why I bought the cable steer pack. I'll use my Lowrance HDS-9 Gen 3 touch to control the autopilot. I also bought a new 19ft Teleflex steering cable. I have no idea how old or new the steering cable is in my boat. It turns the boat good, but I wanted to use a new cable with my new autopilot. It's a work in progress, SLOW progress. I'm working on it little by little, as I find the time. I just figured I would document the installation on this forum. I've never installed an autopilot before, but I have replaced a helm and steering cable on a previous boat about 8 years ago. Be patient as I slowly progress through this project. I'm doing the work without any help, and I'm in no hurry to finish it, as I have other chores and responsibilities. Last night I started just before dark. I had to remove the steering wheel first. I chose to install the "auto-standby" button. I wanted it easily accessible on my helm. The problem is, I needed to drill a 7/8" hole in my plastic helm, but all I had was a 13/16" spade bit. The other problem is, the plastic helm that the gauges are mounted on is 34 years old, it's brittle, and it's irreplaceable if I break it. So I took my time with the drilling. Then I had to use a round file to make the hole big enough for the button to slide into the hole. This took longer than I anticipated, but I finally got it installed. Let me say this before I get started... nothing is as simple as it should be It still doesn't fit yet Finally finished the first "simple" task It's well past dark outside, so I'll stop for the night.
-
Thanks! It turns out that I won't get my water pump kits replaced on my main motor and kicker motor today, so I'll be fishing on a friend's boat west of Henderson tomorrow. I'll PM you from the lake when I do make it to Oswego.
-
Thank you.
-
I forgot to ask if there was a launch fee.
-
Thanks for the info, much appreciated! Best of luck tomorrow.
-
Just wondering where a public boat launch is located in or near Oswego. Is it Wright's Landing? I've never launched in Oswego before, always launched up north by Henderson. I'm looking for other public boat launches in or near Oswego. Thanks in advance!
-
Sea Nymph 19.5 Center Console Restoration
Todd in NY replied to Great_Laker's topic in This Old Boat
 I didn't think you were accusing me, sorry if I came across that way. It probably needed a new transom when I bought it. I was providing a short history of the boat. I'm glad you bought it and made it right. It will serve you many good years. You did a great job of bringing the boat back up to it's full potential. That's awesome to see!
 -
Sea Nymph 19.5 Center Console Restoration
Todd in NY replied to Great_Laker's topic in This Old Boat
Mine was a 1987, with a 1986 Evinrude 90. I owned it one year, and I had to have it rewired. I also put a new NFB steering cable in it. It's hard to keep up with how many owners have had it after I sold it. It didn't take me long to realize I needed a bigger boat with a porta potty and a cuddy cabin for my disabled wife. I don't know why someone would use PT plywood in an aluminum boat. It's not hard to find information on the internet about that sort of thing. It appears your boat is in the right hands now. They are a great platform for a 19ft boat, and deep enough inside to feel safe in rougher water. I hope you catch a lot of fish with that boat. Best of luck and stay safe. -
Glad you got your boat out, got your rod back, and caught some fish, congrats!
-
Minn Kota Terrova On A Row Boat, and Much More
Todd in NY replied to Todd in NY's topic in This Old Boat
 I thought I did a follow up report last year but I obviously didn't. The trolling motor, all of the electronics and the new 15hp Mercury motor work great. This project turned out to be an absolute success, and it exceeded all of my expectations.
