
carpedium
-
Posts
1,250 -
Joined
-
Last visited
Content Type
Profiles
Forums
Events
Gallery
Store
Everything posted by carpedium
-
Got the consoles sanded, primed, and the first coat of finish paint on. It went on really well - I used rustoleum in the can and sprayed it on. Pics!
-
Just ordered this little puppy. I like the peace of mind of having a second battery to operate my downriggers and possibly a trolling motor without draining my main battery.
-
Aztec manufacturing in spencerport did a good job welding my boat. Ask for Simon. He would probably it for less than 60. [ Post made via Android ]
-
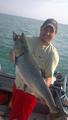
Welcome back! We all get the salmon in our blood...
-
http://rochester.craigslist.org/boa/2964789602.html Hope nobody gets hurt!
-
In that case I could probably just use stainless.. no?
-
Does one have to worry about electrolysis issues with a brass thru-hull fitting on an aluminum boat? Zinc would still be lower on the chart... but what do ya'll think?
-
One can hope! But im sure you'll be out again before me. Either way when its done we should plan to get together
-
Yeah I really like how your boat turned out as well based on the pictures you posted. I am looking at this washdown pump: http://www.overtons.com/modperl/product ... chID=4005# I look forward to seeing you out there too.. at this point i look forward to plain being out there.
-

Aluminum boat hull repair tips.. help appreciated
carpedium replied to gregmacedon's topic in This Old Boat
You could add aluminum to the inside and rivet it - If you are in the area I have extra rivets and a gun -
Tonight I made replacements for the dash - captain and navigator side. I ended up going with aluminum tread plate over left over decking, and I think it came out well. I bonded the aluminum to the wood with liquid nails, and now I just have to cut the correct holes in for the switch panel, steering wheel, glove box, etc. then de-burr, and mount. I am also going to knock down the mirror finish with a brass wire brush to give it a brushed aluminum finish. This will cut down on the glare. I fastened the aluminum to the wood with rivets to seal tight - then I'll use rivets to mount them to the console itself. Pics: Not a bad evening!
-
I had the same problem and used aluminum on the inside glued on with 3M 5200 and kept in place by the glue and the wood transom. If you do any repairs like that, it is an opportunity to add a heavy piece of wood on the outside. You can screw your transducer onto the wood instead of drilling a new hole into the hull. That's a great idea, if not a piece of wood, a flanged piece of aluminum for that purpose.
-
Interesting, thanks for the info!
-
Hmm... that's a pretty neat idea. I guess I never considered one of those for a little tinny like mine. I like it.
-
What would you guys do to patch the two holes on the right... previously for the livewell? Im thinking aluminum plate, epoxy and rivets?
-
Jax Shakedown- Trek to the Oak 4/14
carpedium replied to Jax's topic in New York Fishing Reports - Lake Ontario (South Shore)
Great to see you're getting into the groove with you new ride! good luck this season -
Flare gun? That would get their attention if they really didn't see you
-
Are we still talking about a boat rebuild? Depends who the beads are for.
-
I'm glad you chimed in, I like the way your project turned out! The reason I didn't go with herculiner was 100% an intended use thing. This boat gets used to recreation as well as fishing, so since the herculiner is only available locally in black, it would have made for some hot feet
-
haha, someone is paying attention! Yeah I ended up just using a pencil. The epoxy for the floor isn't cured completely yet, but I do have a shopping list: 2) Thru-hull fittings for bilge pumps 6' of new bilge pump hose (replacing the old and adding another) New switch panel for dashboard battery selector switch Paint for interior and exterior Primer Zinc Chromate Enamel hardener A cooler to double as captains seat Lots of wire Cup holders ... think thats 80% of it
-
Weekend summary: Got done: Saturday: - Inspect tig welds at stringer ends - Power wash interior of boat shell - Level and fill hull with water to identify leaky rivets. Mark with wife's eyeliner. - Drain water and drill rivets out. - Dry area and replace leaky rivets with closed end pop rivets. - Degrease hull, scrub, then etch interior of hull with vinegar/water mix. - Test hull for water tightness a second time - Dry inside of hull and apply heavy coat of gluvit. - Cover with heat lamp and let cure overnight. Sunday - Ensure Gluvit cured - Measure and cut decking pieces to required sizes - Measure and cut foam to required sizes - Install foam - Dry fit decking - Epoxy decking - Install decking Did not get done: - Cut and fit new dash wood, paint. - Install consoles - Cut and Fit bow-rider wood I thought my to-do list was a little soaked in wishful thinking, but all in all it feels like progress!
-
Got the floor in today, again with the help of my buddy. I ended up going with the advantech, since I don't want to end up with a boat that is loud and possibly spooky to fish while trolling. It went in well, and we slathered it with epoxy. Fastened the deck down with 3/4" diameter SS rivets. It is SOLID! Next up: Paint consoles Add spray-in bedliner Add secondary bilge pump Replace thru-hull fittings More pics!
-
Gluvit looks good, foam going in! [ Post made via Android ]
-
Well, had a VERY productive day yesterday thanks to my friend Joey. We ended up getting the hull watertight again which included replacing/sealing/bucking all necessary rivets. Around 10:30PM the gluvit went in and it sat overnight to cure. I still havn't been out to the shed to check it out, but will update on how it turned out later. For now, here are some progress pictures: The aluminum decking.. Had to move it inside due to rain Welded stringer ends Replaced rivets with epoxy for overkill. You could literally eat off of this thing. We applied adhesive remover to remove the rest of the carpet adhesive and foam that was stuck to the deck. We then powerwashed it really well, and vacuumed, then blew out with compressed air to dry. Then scrubbed the interior with degreaser, then brass wire brushed all rivets from the interior, vacuumed, went over everything with automotive paint prep and wiped all down with a clean cloth. Gluvit went down... Used about 1/2 of the gallon container on the first coat. Oh, it went on very thick. Easy to mix and paint though. All seams and rivets were treated
-
Thanks, please let us know how it works