
carpedium
-
Posts
1,250 -
Joined
-
Last visited
Content Type
Profiles
Forums
Events
Gallery
Store
Everything posted by carpedium
-
 Thanks for sharing! Just had to have that glow frog! Was that a cheater on a short lead, or a completely separate rod?
 -
Last night I got the other side de-scuzzed, sanded, acetoned, sanded, and primed (2 coats). This morning I got the whole boat sanded again, tacked, then primed for the final coat. ehh, it looks the same as the last pic, but I uploaded it so its gonna get posted!
-
I got the power TnT parts in the mail from Canada today... Only to find that the kit contained this: Instead of this: I called the place I bought the kit from (Hastings Marine) and they are working on seing if they have another one that they can ship out. I hope they do! I also got the rest of the transom prepped and primed on my lunch break, and was able to move the boat back on the trailer using brute strength.
-
hahaha alright alright Last night I was able to get half of the hull prepped, with 3 coats of primer (4 if you count the ZC on bare AL spots) I sanded really well between each coat. The main prep was the most difficult - The goofoff worked alright, the WD-40 didn't seem to work well with this type of adhesive. I ended up just wiping down with a lot of acetone and that did the trick. After that, I brass brushed and of the chipping or irregular spots (not many) and gave the whole thing a good scuff with 150, then 220, then 500 grit. In between primer coats I sanded with the "between coats" pad pictured above - I love that thing. My can of ZC is kind of spitting and sputtering now at the tip, so there was some nubs to sand down. In between coats I also got the old livewell drain plugged up. I ended up going with 1/8" aluminum plate and epoxy to seal it. I took a 3.5" by 7" piece of aluminum, bent it so that it was at an angle, then drilled it out using 3/4" centers on the rivets all around the plate. I drilled 3/16 holes first, and riveted the plate to the hull using two of those, one in each corner. After that I drilled the rest of the holes through the hull and plate using a 1/4" bit - so everything is perfectly aligned. All that was left to do was drill out the 3/16 holes, and everything was golden. After everything was sanded, cleaned, and acetoned I slathered epoxy on the plate and stuck it on with the rest of my 1/4" closed end rivets. Popped it on and it is not going anywhere. Based on the manufacturers data on the rivets, the strength of the patch exceeds the shear strength of the aluminum. I made the patch twice as long so that I could bend the bottom half up to work as a transducer mount. This way I wont have to put more holes in the transom when I mount the transducer. Last night I also plugged all of the old holes with rivets and epoxy. I also drilled two core samples in the transom to be sure I was not wasting my time here. The shavings were light in color with a red hue. The wood around the motor mount holes also looks good. I will get some pictures of that to post soon. I got up early this morning to finish prepping the Transom, sanded, acetoned, and put the first coat of primer on (ZC). Tonight I plan to get the other half of the hull prepped and to the same point as the first half. Then tomorrow I can clean out the shed, experiment with the color, and start spraying my main coats. Pics of the progress:
-
That you are feeding from your hand?
-
Is that a Bear?
-
Solid Blind Pop rivets for aluminum hull repair
carpedium replied to carpedium's topic in This Old Boat
Here's a video: -
Solid Blind Pop rivets for aluminum hull repair
carpedium replied to carpedium's topic in This Old Boat
Yup, these went in without a problem. I would recommend the pop rivets to anyone. The standard rivets would have also worked, but there were some areas where I could not get to both sides still. -
This unit has been great for me, but its time to upgrade to something with integrated GPS. Pictures will follow later tonight. Included: transom mount transducer and wiring Power cable Temp probe and wiring Head unit w/quick disconnect and base
-
Nice! thanks for the report Bob
-
Thanks, Doug. Yeah, give me a call anytime!
-
Got the consoles 100% riveted down. They are very solid. I hope to get the outside of the boat sanded (scuffed), primed, and painted this week so that it can harden for a week or so then i'll be able to splash!
-
The texture is AMAZING. It is completely non-skid, but also is not too rough at all on the feet. The rubber flexes with your foot movement, so it doesn't scrape at all. There won't be a need to put carpet down to tame this at all. I used rubber "dust", instead of the more aggressive "crumb". I did get the consoles in, I will post more pics of this later.
-
As promised, some pics of the 80% cured "bedliner": Prep for this took 3-4 days, including taping, 3m 5600ing around the edges, sanding - scraping, etc. Doing a good job on the prep & taping off areas that need to be protected is critical. There are areas around the edges that I could have done a better job "smoothing out" the 5600 - and it kind of shows. Im not dissatisfied, just something I would have spend more time on.
-
As far as a charter goes, I can personally recommend Jac's Mate out of welfleet harbor. We've been out with him several times and have never been disappointed. http://home.comcast.net/~jacsmate/
-
I think I saw a set on Rochester Craigslist...
-
Are there any fish at Lake Ontario & St. Lawrence River ?
carpedium replied to cyclops2's topic in Open Lake Discussion
My family has a place on the water up there, looking out right between the two islands. I spent most of my summers up there as a kid - and this is correct. Very very dicey with long shoals off of points, and boulders littered around the islands. -
That's pretty interesting. It looks to be the same base/makeup as the product I have - but its applied in a different way. I like the finish. I'm set to spray in my floor probably tomorrow. Exciting.
-
Bondo to the counter-sunk rivets and some aluminum treadplate for under the consoles. This thing works great! Got the sides of the gunwales primed, and another coat of finish paint on the consoles Primed the gunwale sides with a few more coats of this stuff: Final finish coat on everything, except the motorwell, which will get sprayed when the motor comes off. I got the bedliner spray in the mail yesterday, and will apply that as soon as it gets warm enough. I am asking a lot of the paint to cure in 34 deg weather, but its almost set up from last night. I want to spray the tops of the gunwales with the spray in bedliner for extra protection, non-skid, and to cover up any blemishes that are there. Does anyone see a downside to doing this?
-
Dusting here is Spencerport - seems to be melting as fast as its snowing
-
exactly what I do as well [ Post made via Android ]
-
Building a pole barn for my boats and toys
carpedium replied to buckboardjr's topic in This Old Boat
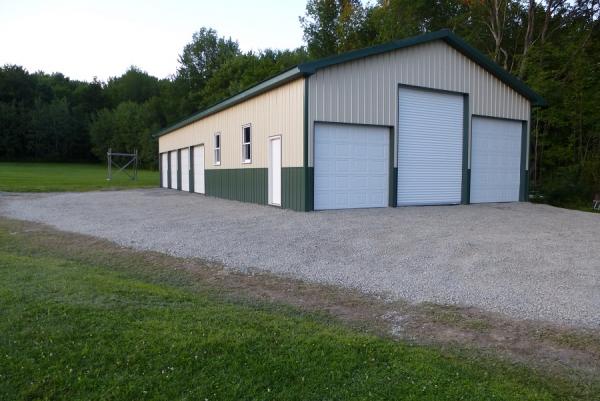 NICE!
NICE! -
Aluminum boat hull repair tips.. help appreciated
carpedium replied to gregmacedon's topic in This Old Boat
If you can get at it from the inside - you can do the same thing except with the rivets being the only thing showing on the outside. -
Aluminum boat hull repair tips.. help appreciated
carpedium replied to gregmacedon's topic in This Old Boat
Check this out: http://forums.iboats.com/showthread.php?t=536250 -
Got the dual bilge pumps in this AM