

lrg355
-
Posts
781 -
Joined
-
Last visited
1 Follower

Recent Profile Visitors


lrg355's Achievements
101
Reputation
-
for sale : usa 70 HP Yamaha 2 stroke for parts
lrg355 replied to lrg355's topic in Classifieds - Buy, Sell, Trade or Rent
 Motor is located at lake Oneida
 -
for sale : usa 70 HP Yamaha 2 stroke for parts
lrg355 replied to lrg355's topic in Classifieds - Buy, Sell, Trade or Rent
I am from Mountaintop area. If you are interested in the motor I can bring it back. -
for sale : usa 70 HP Yamaha 2 stroke for parts
lrg355 replied to lrg355's topic in Classifieds - Buy, Sell, Trade or Rent
Kingston, Pa or Kingston, Ontario? -
 Picaritin works way better than DEET. The brand I use is Sawyers. Usually can find it at Target stores.
 -
-
Mexico bay
lrg355 replied to Hunter315's topic in New York Fishing Reports - Lake Ontario (South Shore)
Been very slow here lately -
for sale : usa 70 HP Yamaha 2 stroke for parts
lrg355 replied to lrg355's topic in Classifieds - Buy, Sell, Trade or Rent
Ttt -
for sale : usa 70 HP Yamaha 2 stroke for parts
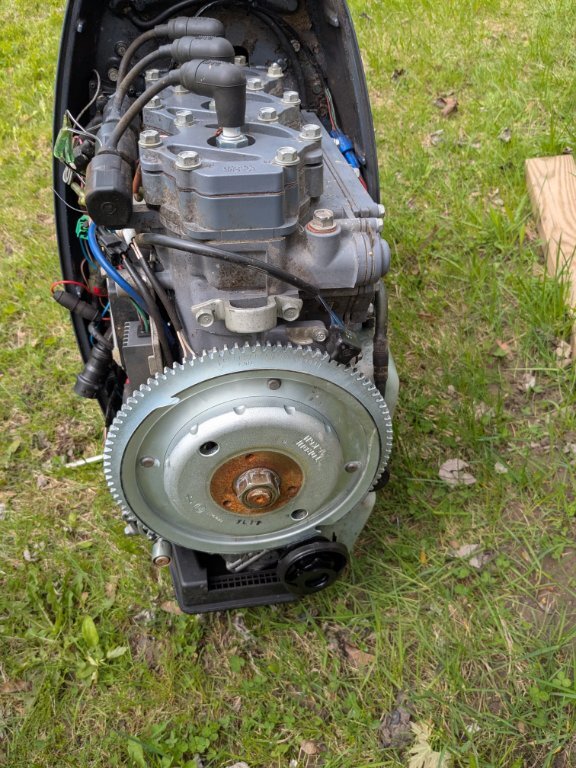
lrg355 posted a topic in Classifieds - Buy, Sell, Trade or Rent
1989 Yamaha 2 stroke with bad #1cylinder. All else is in good condition. Controller and 20 ft shift and throttle cables included. $100 -
 FYI, Sylvan and Starcraft are both divisions of and made by Smoker Craft. Don't know how far back that goes but may be useful to know.
 -
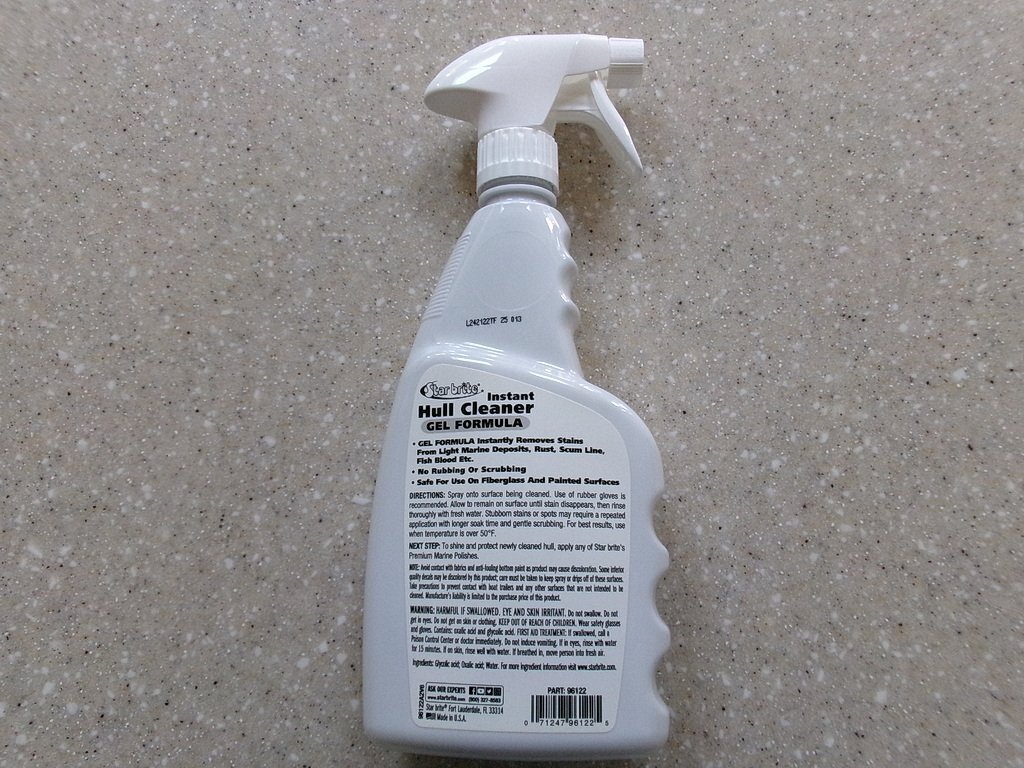 If you use very hot water with Slimy Grimey it works much better. I always bring a large pot of water near boiling then do the mix in the sprayer.
 -
You can go online and find data on which boat brands stopped using wood in structural applications and what year they stopped. That is the best indicator of how to eliminate future problems.
-
Noco Genius is a solid unit. Have two and never had any problems.
-
Mexico Bay Reports
lrg355 replied to chowder's topic in New York Fishing Reports - Lake Ontario (South Shore)
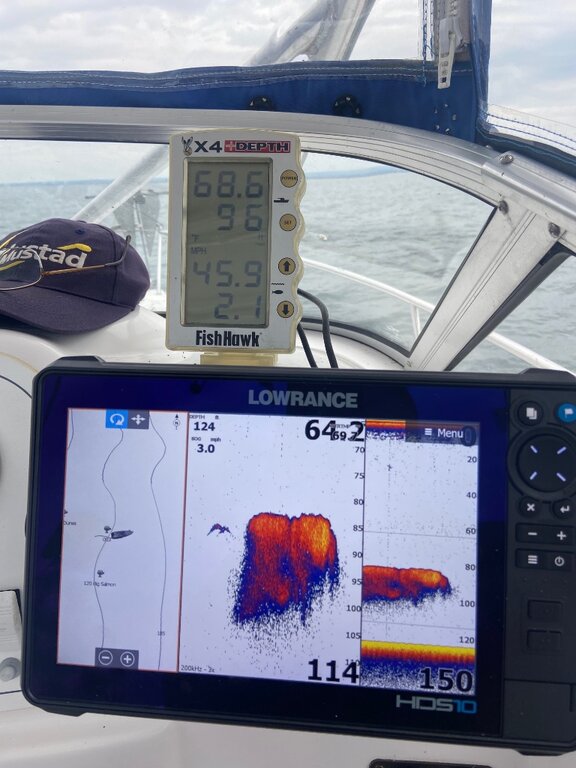 Fished yesterday afternoon/eve from 2pm to 7pm. Motored out of Sandy Pond and headed to 140 ft in front of the Salmon river. Rough ride to get there but tolerable when trolling. Good temp down in the 120 ft range. Only one 12 lb Coho on a Warrior Salmon Candy for nearly 4 1/2 hrs of trolling. Had a few boats nearby and never saw any activity on any of them.
 -
Mexico Bay Reports
lrg355 replied to chowder's topic in New York Fishing Reports - Lake Ontario (South Shore)
Way off normal for this time of year -
Mexico Bay Reports
lrg355 replied to chowder's topic in New York Fishing Reports - Lake Ontario (South Shore)
Semi sucks. Working hard but getting a few.
