


John E Powell
-
Posts
786 -
Joined
-
Last visited
Content Type
Profiles
Forums
Events
Gallery
Store
Everything posted by John E Powell
-

Dipsey divers
John E Powell replied to Bo dan den's topic in Questions About Trout & Salmon Trolling?
There have been many questions about diver fishing dealing with rods and reels, and wire, braid and mono lines, and many methods of how to rig them. Every week or so, it seems some aspect is rehashed in popular fishing forums. Many new or inexperienced people are just starting out with running wire line on their diver reels and there’s been lots of advice, some good and some not as how best to do this. I thought I would offer a detailed explanation of how I spool 19 strand braided wire onto reels. My recommendations are based on well over 3 decades of fishing for trout and salmon at both a recreational and professional level. Here is what I feel to be the best way to fill a wire diver reel. *Note* At the end of this, I’ll offer some general suggestions as well as some rigging variations for slide divers and how to rig a Dipsy diver or Walker diver to slide on wire line rods. Some people recommend using electrical or duct tape wrapped over wire (or braid) to keep it from slipping on the reel’s spool (making the reel unusable). While the electrical or duct tape over the knot works, I don't like it for two reasons. The first reason is because it adds a layer of messy glue to your reel spool and later on down the road when it comes time for a changeover you will have messy residue to deal with, and the second reason is if you actually get down that far, the tape will be lifted off the line and you will lose spool adhesion. This could lead to a variety of problems including fouling the tape between the levelwind gear and carrier jamming the reel. A better way is to use a method that avoids these potential pitfalls. It requires a little more effort and planning but is a much more elegant way of filling the reel that “Bubba’s duct tape approachâ€. This method uses just enough mono to tightly grip the spool and prevent slippage. I call this a monofilament “under wrapâ€. To this under wrap I tie just enough super braid backing so the wire will fill the reel completely (I use power-pro). How do I know how much backing is just enough? There is a trick to it and I’ll explain it in detail below. Finally the wire goes over the top of the backing and then you tie on your snap swivel. Basically, to get the correct amount of backing on the reel under the wire, it is necessary to fill the reel in reverse so the backing is the last thing to go on the reel. Then, the reversed backing and wire is unwound and wound on in the correct order (backing first followed by the wire). Here's my step by step method explained for preparing two identical line counter reels so the wire completely fills the reels. Based on how wire is sold, either from bulk spools or 1000’ spools, there are three likely scenarios you might choose from. I’ll explain each scenario in a bit, but first, you will need to do some preparatory work to each reel. 1) First, mount both reels on the rear half of a rod that has at least one guide on it (to help keep your line centered as it enters the reel’s levelwind) and to give you an easy-to-hold-onto rod grip as you work with the reels to fill them. 2) Next, you need to get just enough mono onto the spool (one complete levelwind pass) to cover it completely. If your reel has a spool post to tie the line to, start with the levelwind lined up right in front of the post; turn the handle as necessary until the levelwind is located correctly. If the reel spool doesn't have a post, start the levelwind all the way to either side of the spool. Using your monofilament (I suggest 20-25lb test), tie an arbor knot around your spool: http://www.animatedknots.com/arbor/index.php?Categ=fishing&LogoImage=LogoGrog.jpg&Website=www.animatedknots.com If your spool has a post, carefully place the first overhand knot over the post before you begin to snug the arbor knot down. *NOTE* At this point it is important to reset your levelwind counter if you will be using a method that requires backing, it is not necessary to do this if working from a bulk spool and not using backing. Wind on enough mono to completely cover the bottom of the spool. Cut the line from the spool. Repeat these steps on the second reel making sure you have the same amount of mono on each reel. At this point, you have three approaches to decide from. You can (3a) fill your reel with wire and no backing from a bulk spool, (3b) split your 1000' spool into two 500' sections of wire and use backing – the wire "top shot" method, or (3c) fill each reel with a 1000' spool and use backing. 3a) If you are working from a bulk spool and are going to fill the reel with all wire and not use any backing, then splice your wire to your mono using an Albright knot: http://www.animatedknots.com/albright/index.php?Categ=fishing&LogoImage=LogoGrog.jpg&Website=www.animatedknots.com When you follow the animation in the link, your wire will be the white rope and your mono will be the blue rope. At step three in the animation, you want to bend the wire over a small nail first to create a nice tight loop where the knot will snug up - this will prevent the wire from kinking. Making sure you hold the wire spool under tension, wind your wire onto the reel until the reel is filled. Go to step 4. 3b) This method helps to keep the cost down by using only one 1000' spool of wire, divided in half, to fill two diver reels. The first step is to split the wire in half. Run the wire through the guide(s) and levelwind of the first rod/reel and place the wire temporarily over the end of the mono and tape it in place with some masking tape there is no need to permanently splice this as you will be removing it later on.. If your line counters on each reel are within a few feet of each other after loading on the mono under wrap, then ignore this small difference and wind on all the wire keeping the spool of wire under consistent tension. If the line counters are not within a few feet of each other, reset them before winding on the line. *NOTE* You will notice that the line counter is counting in reverse and may go past the "000" mark and begin counting down again as you transfer all the wire to the first reel. When all the wire has been transferred to the reel, feed the back end of the wire through the guide(s) and levelwind of the second rod/reel temporarily taping it down in place over the mono just like before. Wind a few turns of wire on the second reel making sure it doesn't slip; if it does slip, you lose your line counter reading accuracy. Once you have a few turns on covering the tape so the wire line can't slip, begin winding the wire onto the second reel from the first reel. Adjust the first reel’s drag so the line is pulled off the first reel under tension. Now, you need to remember that you may have gone around the first reel's counter once and you have to account for this. If the first reel went around once and stopped at, for example "600" and the second reel started at "980" you will notice that as you wind line on your second reel from the first, the first reel's counter will be going up and the second reel’s counter will be going down. At some point, the line counters on each reel will have the same reading (in my example at about “790â€). This is not the middle of your wire line because the counter on the first reel went around once, do not cut your wire line here. Continue to transfer line from reel one to reel two. After a little bit, you will see that the counter on reel one will go past "000" and start to count up again. Somewhere around 300 feet or so, both reel’s line counters will match each other for a second time; this is the middle of your wire and you will need to cut the wire here. Now, you have two partially filled reels; one needs to have the wire removed to temporary storage, either onto a third reel or onto the original spool. A this point, you need to top off the one reel that still has wire line with backing, so run the backing through the guide(s) and splice your backing to the wire using an Albright knot: http://www.animatedknots.com/albright/index.php?Categ=fishing&LogoImage=LogoGrog.jpg&Website=www.animatedknots.com When you follow the animation in the link, your wire will be the white rope and your braid backing will be the blue rope. At step three in the animation, you want to bend the wire over a small nail first to create a nice curved tight loop where the knot will snug up - this will prevent the wire from kinking. Unwind any loose wire and, keeping the wire and braid line under tension, fill the reel completely (without overfilling) according to the directions that came with your reel. Cut the backing once the reel is filled. This will generally be about 1/8" below the rim of the spool. Now you have a reel filled with the wire and backing on in reverse. You will transfer this line to your second reel. Splice the backing from your first reel to the mono of your second reel using the same Albright knot making sure the mono is the "white rope" and the braid backing is the "Blue rope" in the animation. *Note* If you previously forgot to reset your line counter after tying the arbor knot and winding your mono on, you will need to unwind the mono on the second reel, reset the counter, and then rewind the mono back on the reel. Transfer all the backing onto your reel and write down the line counter reading at the point of the splice between your braid and wire. This will tell you how much backing to put on your next reel. I recommend keeping a written reel fill log in a notebook someplace safe for future reference so you can avoid repeating these steps. *Note* The line counter reading is not how much line you actually put on your reel as it becomes less and less accurate as line is removed from the reel, it's just a reference number that you can duplicate when you fill similar reels. Once you have the wire to backing splice point noted, wind on the rest of your wire making sure you keep tension on the wire as you transfer it from the first reel to the second reel. You will now fill your second reel using the line counter data you wrote down from the reel you just filled. Run the end of your backing through the guide(s) and splice the braided backing to the mono as you did before, mono being the "white rope" and braid being the "blue rope" in the animation. If this reel's line counter was not reset, unwind all the way to the arbor knot, reset the line counter and begin reeling in the line keeping the braid under tension. When the counter reading matches the reading from the first reel, cut the backing and splice on the remaining 500' section of wire using the Albright knot. The wire will be the "white rope" and the braid will be the "blue rope" in the animation. Fill the second reel keeping the wire under tension. Go on to Step 4 3c) If you are working from a 1000' spool of wire and are putting all 1000' on one reel, string the wire through the guide(s) and levelwind and lay it on top of the end of your mono and place a piece of masking take over the end of the wire to temporarily hold it in place and wind on all your wire keeping the wire line spool under tension. A this point, we want to top off our reel with backing, so run the backing through the guide(s) and splice your backing to the wire using an Albright knot: http://www.animatedknots.com/albright/index.php?Categ=fishing&LogoImage=LogoGrog.jpg&Website=www.animatedknots.com When you follow the animation in the link, your wire will be the white rope and your braid backing will be the blue rope. At step three in the animation, you want to bend the wire over a small nail first to create a nice tight loop where the knot will snug up - this will prevent the wire from kinking. Unwind any loose wire, and keeping the line under tension, fill the reel completely (without overfilling) according to the directions that came with your reel, and then cut the backing from the spool once filled. This will generally be about 1/8" below the rim of the spool. Now transfer this backward wound line to your second reel. Splice the backing of the filled reel to your mono line spooled onto the empty reel using the same Albright knot making sure the mono is the "white rope" and the braid backing is the "Blue rope" in the animation. *Note* If you previously forgot to reset your line counter after tying the arbor knot and winding your mono on, you will need to unwind the mono, reset the counter and then rewind the mono. Transfer all the backing onto your reel and write down the line counter reading at the point of the splice between your braid and wire. This will tell you how much backing to put on your next reel. I recommend keeping a written reel fill log in a notebook someplace safe for future reference so you can avoid repeating these steps. *Note* The line counter reading is not how much line you actually put on your reel as it becomes less and less accurate as line is removed from the reel, it's just a reference number that you can duplicate when you fill similar reels. Once you have the wire to backing splice point noted, wind on the rest of your wire making sure you keep tension on the wire as you transfer it from the first reel to the second reel. You will now fill your second reel using the line counter data you wrote down from the reel you just filled. Run the end of your backing through the guide(s) and splice the braided backing to the mono as you did before, mono being the "white rope" and braid being the "blue rope" in the animation. If this reel's line counter was not reset, unwind all the way to the arbor knot, reset the line counter and begin reeling in the line keeping the braid under tension. When the counter reading matches the reading from the first reel, cut the backing and splice another 1000' spool of wire using the Albright knot. The wire will be the "white rope" and the braid will be the "blue rope" in the animation. Fill the second reel keeping the wire under tension. 4) Now you need to attach a quality ball-bearing snap swivel to the wire. I don’t know the name of this knot, but here is a link to the instructions to tie it: http://www.lotsa.org/Wire%20Line%20Knot.htm If you want to rig a Slide Diver or Dipsy/Walker diver to slide, skip this step and see the rigging variations below. Some general suggestions and variations in rigging: 19 strand wire is softer and less abrasive to guides than 7 strand wire. 19 strand will also tend to fray before failure generally giving you an opportunity to repair or replace it before it breaks off on a big fish losing all your gear and terminal tackle. 7 strand tends to resist failure more as the individual strands are heavier and stronger, but you have little notice when it is about to fail. Your chances of not losing $40 worth of swivels, diver, attractor and fly to a wire line failure are better with 19 strand wire than with 7 strand wire. For these reasons most people are moving to 19 strand wire over the 7 strand wire. If your rod doesn’t have a roller tip, consider replacing the standard tip with either a Twili Tip or a Torpedo swivel roller tip. The Torpedo is a more expensive, but better solution. The Twili is an effective less expensive tip, but it’s ugly and heavy. You’ll need to use care to make sure the swiveling Torpedo tip hasn’t flipped over and wrapped the wire partially around the tip each time you set the rod if you choose the Torpedo over the Twili. Rigging the Slide Diver (or Slide Diver Lite Bite) on wire rods: Instead of attaching the snapswivel to the end of your wire, you will create a mono top shot over the wire with a fluorocarbon leader and two swivels. Start by using a Palomar knot: http://www.animatedknots.com/palomar/index.php?Categ=fishing&LogoImage=LogoGrog.jpg&Website=www.animatedknots.com to tie an appropriately sized snap or snapswivel to one end of a 5’ fluorocarbon leader, and a medium size ball-bearing swivel with welded rings to the other end. Set it aside. Measure out and cut 25-30’ of Trilene 30lb Big Game. Slide a clear plastic bead over one end of the mono, then tie the other end of the ball-bearing swivel (of the fluorocarbon leader) to the end of the mono next to the plastic bead with the Palomar knot. Next rig the Slide Diver following the instructions on the packaging. Next, use the Palomar knot to tie a size 8 “Spro Power Swivel†to the other end of the mono. The rigging from lure to rod should now be as follows: Snap/snapswivel, fluorocarbon leader, ball bearing swivel, mono, plastic bead, rigged Slide Diver, and Spro Power Swivel. The Spro gets attached to the end of the wire in a method that will allow you to easily pass through the guides and levelwind. Start by cutting a 3/4" long section of 1/8†diameter clear heat shrink tubing. Slide it over the end of the wire line. Use the LOTSA knot http://www.lotsa.org/Wire%20Line%20Knot.htm making sure to work the knots to minimize the knot size so the heat shrink slides over the knots. Also, keep the second knot less than 1/2†from the first. Slide the heat shrink up over the eye of the Spro and shrink it down covering both knots. Alternately, you can eliminate the Spro altogether and splice the mono to the wire with an Albright knot: http://www.animatedknots.com/albright/index.php?Categ=fishing&LogoImage=LogoGrog.jpg&Website=www.animatedknots.com white rope is wire, blue rope is mono in the animation. To rig a Dipsy or Walker Diver to slide on a wire line rod, you will need the diver, one small snap, one Big Jon Jettison Sinker Release, one small split ring, and one large 1/2-5/8†inside diameter split ring. First, you need to modify the diver. There are three things you need to do. 1) Tighten the diver release so it doesn’t trip, you won’t be using it anymore as a release, just as a tow point. 2) Remove the swivel on the front of the diver and add the large split ring in its place on the release arm. 3) Remove the swivel on the rear of the diver and attach the small split ring to the welded ring of the diver, then the small end of the snap to the split ring. Set the modified diver aside. Using a Palomar knot: http://www.animatedknots.com/palomar/index.php?Categ=fishing&LogoImage=LogoGrog.jpg&Website=www.animatedknots.com tie an appropriately sized snap or snapswivel to one end of a 5’ fluorocarbon leader, and a medium size ball-bearing swivel with welded rings to the other end. Set it aside. Measure out and cut 25-30’ of Trilene 30lb Big Game. Slide a clear plastic bead over one end of the mono, then tie the other end of the ball-bearing swivel (of the fluorocarbon leader) to the end of the mono next to the plastic bead with the Palomar knot. Now rig the Jettison release onto the mono line. First slide on the “F†shaped part of the release with the bottom of the “F†facing the rod and the top of the “F†facing the lure. Now slide the pin onto the mono, then use the Palomar knot to tie a size 8 “Spro Power Swivel†to the other end of the mono. The rigging from lure to rod should now be as follows: Snap/snapswivel, fluorocarbon leader, ball bearing swivel, mono, plastic bead, “F†part of release, pin part of release, and Spro Power Swivel. The Spro gets attached to the end of the wire in a method that will allow you to easily pass through the guides and levelwind. Start by cutting a 3/4" long section of 1/8†diameter clear heat shrink tubing. Slide it over the end of the wire line. Use the LOTSA knot http://www.lotsa.org/Wire%20Line%20Knot.htm making sure to work the knots to minimize the knot size so the heat shrink slides over the knots. Also, keep the second knot less than 1/2†from the first. Slide the heat shrink up over the eye of the Spro and shrink it down covering both knots. Alternately, you can eliminate the Spro altogether and splice the mono to the wire with an Albright knot: http://www.animatedknots.com/albright/index.php?Categ=fishing&LogoImage=LogoGrog.jpg&Website=www.animatedknots.com white rope is wire, blue rope is mono in the animation. To rig the diver, hold the jettison release in your hand as you let the lure out behind the boat. Place the large split ring between the two parallel bars of the “F†section of the release and insert the pin through all three parts. The diver should now be hanging from the release pin. Open the snap on the rear of the diver and hook it over the mono line and close the snap. You will have to experiment with how far to push the pin into the release, the further the pin is pushed in, the more force it will take to release the diver. Hopefully that is not information overload, it shouldn't be too hard to follow if you go slowly. -
Dipsey divers
John E Powell replied to Bo dan den's topic in Questions About Trout & Salmon Trolling?
Just a thought since you are running snubbers. Snubbers go between the diver and lure, not in front of the diver. -
I'll be traveling from Niagara Falls to Sodus for the Pro/Am this weekend. It's been years since I've been east of Oak Orchard and am wondering what are the must see tackle stores between the Oak and Sodus? I am good with Narby's and Captain's Cove at the Oak, just need suggestions from there on East.
-
The Lake Ontario Trout and Salmon Association (LOTSA) held their annual club Salmon Tournament and Family Picnic this past Saturday, July 13 for club members and their families and guests. This was a catch and release big fish tournament, so the goal for teams fishing the tournament was to catch and one large fish. Teams were required to call in each fish as it is landed to tournament control to determine if it may be in contention for a prize; in this way, teams could practice catch and release of smaller fish not in contention for a prize. Weather reports called for winds to build during the day from calm overnight conditions, so the tournament started as planned, but by 7:00 AM it was clear that the weather forecast was optimistic as strong East/Northeasterly winds early in the morning quickly built two to four foot waves making it quite challenging for the 29 teams entered in the tournament to fish. Fishing was really good throughout the morning; the bite was strong up until about 11:00 AM when the radio fell silent as the bite ended. Some teams stopped fishing before the end of the tournament having boxed a contender early-on in the day; while others pounded it out in the rough water hoping to make their mark on the leader board. By the end of the tournament few boats remained fishing as the waves had built to three-five footers. Teams fished out of the ports of Niagara River, Wilson, Olcott, Golden Hill and Oak Orchard, but the largest class of fish, including the overall winner, was caught from the area extending half way between Wilson and Olcott on the West to a few miles East of Olcott. Early morning, the bite seemed to be in shallower waters with the best depths of water being 100-150 feet and later on a mid-morning bite was strong in 200-275 feet of water. Various attractor-fly combinations proved to be the top baits catching the vast majority of contending fish. At the close of fishing, the weigh-in revealed team Fish Styx, consisting of (from left to right) Captain Tim Bromund and his father Bob Bromund, and Gary Melnyk and his son Mac Melnyk bested the competition with a 40†chinook salmon weighing 28.97lb. Fishing in waters from 200-250 feet deep, they caught many of their fish on downriggers fished 85-100 foot deep. Wire line divers fished at 200-300 foot were also productive. Most fish were caught on rotating attractors and flies. Attractor-fly combos were the top bait of the day for other teams as well. For their effort, team Fish Styx won the first place prize of $580. Here’s Gary, Mac, and Captain Tim with their fish at the weigh in:   Finishing in second place earning $435, and coming off a second place finish in the Curt Meddaugh memorial fishing tournament the previous day, with a 36†chinook salmon weighing 25.76 lb. was team Fisherman’s Daughter consisting of Greg Wiacek and his daughter Cathie Wiacek, and Patrick Comerford. Here’s a photo of Greg with his 2nd place fish: In third place earning $290 was team HK1 with a 36†Chinook salmon weighing 25.17 lb. Team HK1 members were father and son (and new LOTSA members) Chris and Braden Petrucci, and Robert McKinley. Here’s Braden and Chris with their fish at the weigh-in: It’s been a very long time since we had our last tie (sometime back in to early 80s) but that is what we had happen with two teams vying for 4th place. Team Toothy Critters and team Reel Scream each weighed in a Chinook salmon weighing 24.52 lb. Team Toothy Critters’ fish measured 36.5†in length and team Reel Scream’s fish measured 37â€. According to tournament rules, only weight is a deciding factor, so prize money was divided equally with each team receiving $145. The Toothy Critters team consisted of Captain Gary House and Dennis Hoffman. Here’s a photo of their fish:   Team Reel Scream members for the day was the Husband and wife team of Frank and Amy Schmidhamer. Here’s Frank with their fish: Six other teams weighed-in fish that were in contention for a prize at the time they were caught. Team Black Jaw’s fish weighed in at 24.23 lb.: Playin’ Hookie’s Jeff Smith caught this 24.17 lb. chinook salmon:   Here’s Salmonella’s entry at 23.89 lb.:   Here’s 4-Poles’ entry at 23.85 lb.:   Here’s Mean Machine’s entry at 22.18 lb.: And here’s the final fish that was in contention early on in the day from team toaster at 20.88 lb.:   Here’s the crew frying all blackened salmon caught the previous day during the 3rd annual Curt Meddaugh memorial three-fish tournament (in the fryer on the left) and some donated walleye (in the fryer on the right): One of the many trays of blackened salmon: And that fantastic walleye so graciously donated: http://www.lotsa.org/ (click on the fish to enter the website) http://www.lotsa.org/2013_online_memberform.htm to join LOTSA
-
The Lake Ontario Trout and Salmon Association (LOTSA) held their 3rd annual Curt Meddaugh memorial Fishing Tournament this past Friday, July 12 for club members. The goal for teams fishing the tournament was to catch and weight their three largest fish; the combined weight of the three fish determining the winner. Weather conditions Friday morning tested the twenty-two teams who signed up to fish the tournament; strong Northeasterly winds early in the morning quickly built two to four foot waves making it quite challenging to fish. Some teams called it quits early on, but those teams who braved the rough water were rewarded with impressive catches of Salmon. At the close of fishing, the weigh-in revealed the 4-Poles fishing team, consisting Marty Polovick, Kyle Hovak, and Kevin Flaherty bested the competition with three fish weighing a total of 56.04 pounds. Fishing in waters from 100-250 ft deep, they caught many of their fish on downriggers fished 70-100 foot deep. Divers set at 200-300 foot and copper lines of 300 and 400 foot were also productive. Most fish were caught on Dreamweaver Spin Doctors and A-Tom-Mik flies. Attractor-fly combos were the top bait of the day for other teams as well. Second place, with a three-fish combined weight of 50.45 pounds went to team Fisherman’s Daughter consisting of Greg Wiacek and his daughter Cathie Wiacek, and Patrick Comerford. Third place, for their combined weight score of 48.43 pounds went to the Slammin Salmon team of Matt Dunn, Marc Dunn, and Doug Parker. At the close of the weigh in, all the fish were cleaned in preparation for the annual LOTSA club picnic blackened salmon fry to be held the following day at the pavilion in the Newfane Town Marina. This tournament is a free tournament for members of LOTSA. First prizes was $300 and a hand-held digital fish scale, second prize was $200, and third $100. http://www.lotsa.org/ (click on the fish to enter) To join LOTSA click here: http://www.lotsa.org/2013_online_memberform.htm
-
Wanted Shimano Triton 400 XHS
John E Powell replied to John E Powell's topic in Classifieds - Buy, Sell, Trade or Rent
Still looking for a couple more in decent shape. -
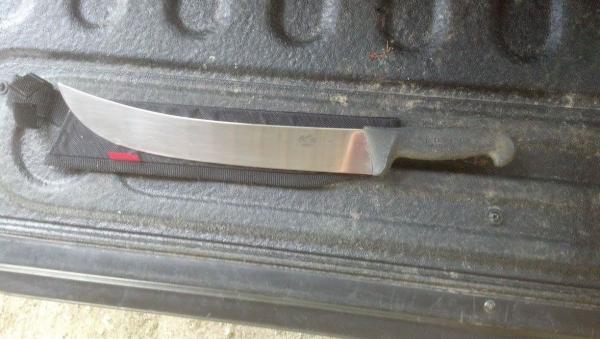 I also like the 10" and 12" Victorinox Cimeter knives for filleting medium and large salmon, but from time to time I have someone that would like steaks instead of fillets. For "steaking" a large salmon I found the 14" Victorinox Cimeter easily sections right through the backbone with little effort. Here's a nice video on how to properly sharpen one of their knives: http://www.victorinox.com/us/content/video/KnifeSharpeningVideo/KnifeSharpeningVideo/6.8713.20US1
 -
yellow mystery stuff that sticks to your line
John E Powell replied to stachy4w's topic in Open Lake Discussion
The easiest way to get rid of them off your line is to minimize their ability to stick to your line in the first place. Many people change over to 30lb test this time of year. 30lb test seems to be large enough in diameter to prevent their hooklike body appendages from catching ahold of your line. Some people just put a topshot of 150' or so of 30 lb line on top of their existing line. Others respool their reels with 30 lb. Still others change over to another set of reels for the summer/fall flea season. -
If you lost a fly but not the attractor, you had either a nick in the fly line, or the line may have fouled on the hook itself and been cut by the hook. In either case, it is unlikely a snubber would have made any difference given your line between the diver and attractor held up to the load of the fish (and is probably 1/2 the lb test of the fly line that broke).
-
This a Ford vs Chevy type question that has been asked before and hashed over in the past with no concensus, nor do I predict this time will settle either. Pro snubber camp says snubbers keep fish on the hook better once hooked, Anti snubber camp says snubbers don't give as good a hookset as without running snubbers. I only run them on steelhead/rainbow lines fished shallow when they are likely to skyrocket out of the water numerous times. IMO the drag of the line through the water is all the snubber you need. That's why I would run a snubber for jumping fish, at that time there is not drag on the line between the fish and diver.
-
2 Dipsy per side question before i end up with a mess!
John E Powell replied to MarkNY's topic in Tackle and Techniques
I would think that if you maintain a reasonably straight troll and speed, and have your dipsy rod horizontal to the water, you should be able to send your copper out over your diver just fine. -
2 Dipsy per side question before i end up with a mess!
John E Powell replied to MarkNY's topic in Tackle and Techniques
Start the day with your outside lines first then work towards the center, it's just easier that way as you can let things out more quickly. During the day when you have your diver lines in the water and you want to let your planers out, let out your copper/core, attach your board, let the board out with minimal tension, just keep the planer upright but not so much tension that it starts to pull to the side. Once you get the board well behind the boat, tighten the line and let the planer pull to the side. It will be well behind your divers. If you are running two or more inline planers per side, you can change outside planers by dropping your rod tip into the water and holding it there for a minute or so as you troll forwards. All the line between your rod and planer will now be in the water and will drag back your planer somewhat. Don't be in to much of a hurry to reel it in because as the planer drops back from the extra drag, that copper or core behind it will sink a bit because it is going slower as the planer falls back. In a minute or so, it will have fallen behind as much as it is going to and will again be running the same speed as before and will raise back up in the water column. I usually wait about 30 seconds to 1 minute after the planer stops falling back behind the boat. Then, hold your rod tip low and bent towards the opposite side of the boat and reel the planer in very quickly. Keep the rod tip low to the water, Do not raise the rod tip until the planer is close enough to the boat that raising your rod tip will lift it out of the water. When running a rod down the chute, add a large 4" or so cork bobber to your line after you let out your copper/core. Then let out more line and run this so the float looks to be about 100' behind the boat, When your small to average size fish hits on other lines, freespool this rod for a minute and let the cork float fall back to 2-300 feet behind the boat. All the line between your rod and the float will be on the surface and usually fish hooked on other lines won't tangle this unless they jump over the chute line (which is very rare). If it's a large fish, a screamer, just reel the chute line in like you normally would instead of letting it back. Keeps your chute rod fishing instead of reeling this rod all the way in and out for every fish hooked on other rods. -
July LOTSA Meeting and Fishing Seminar
John E Powell replied to Tim Bromund's topic in Open Lake Discussion
Just a reminder, the meeting is tonight! -
There is no correct answer to this because different rods have different power and actions. It helps to understand what rod action means. Rod action is the rate at which a rod returns back to a state of rest when flexed and then released. A fast action rod does this quickly and a slow action rod does this slowly. These are terms that are helpful for people who are holding the rods in their hands and casting lures/bait. Fast action rods are good at transmitting "jerky" actions to lures, desirable when your fishing with jigs for instance. Slow action rods are useful when consistency of retrieve is more important. Now we don't cast our trolling rods, but the action of rods have other characteristics that we do use to help us identify desirable trolling rods. Actions range from extra fast, to fast, to moderate or medium, to slow. Sometimes you will see an action between two main actions like medium/fast action. For trolling rods, we can think of action being an indicator of where the majority of the rod bends when lifting a weight equal to the rod's intended power capabilities. To test and determine a rod's action, rods are held horizontally and then a weight is suspended from the tip (the angle between the suspended weight and horizontal rod being 90 degrees) and this weight being equal to the weight the rod is intended to lift. The amount of the rod that bends under this load is an indication of action. Extra fast rods bend mostly in the top 1/4 of the rod. Fast action rods will bend in the upper 1/3 of the rod. Moderate or medium action rods will bend in the upper 1/2 of the rod. Slow action rods will bend well beyond the 1/2 way point of the rod, even into the handle area. The best action for our trolling rods is medium/moderate to medium fast/moderate fast. Diver rods, which have to hold their lines outside and around side mounted downrigger cables, should have a fast action to gain the extra reach necessary to keep the diver lines clear of the downrigger cables. Now, to most efficiently subdue a fish and bring it to net, a reels drag should be set so that when a fish runs, it bends the rod to its action point, the point where you notice the rod transitions from soft to stiff. If you set a drag too tight and load it into the stiff section, you will pull hooks from fish or begin to experience other tackle failures, especially with low stretch or no stretch fishing lines like the braid and wire we use for diver fishing or the copper we use on long lines. If we set our drags too loose, we're just prolonging the time it takes to bring a fish to net because we're not efficiently loading the rod and letting it do the work it is intended to do, subdue and tire fish. So the answer is, choose a rod that has the intended power you need for the task. Look at line ratings and lure weight ranges to clue you in on this, if it doesn't outright say on the rod that it is intended for a task like downrigger or diver fishing. We call these task specific rods. The manufacturer has determined the correct power and action for you. Nowadays, there are task specific downrigger, planer, inline planer, copper, diver, magnum diver, thumper rods, and more. Match the power to the kind of task or experience you want, and choose your reels capacity with a given line weight to compliment this power. Then just set your reel's drag to load the rod to its action point and you will be in business. After a while, you will get a feel for this and know when a drag is too loose or too tight and it will be second nature to adjust it properly without really thinking about it.
-
If you are rigging them with snubbers, try them without the snubbers maybe.
-
That's where we met them. We used to have our boat each year in the LOTSA booth over in the corner of the convention center. My dad used to set up a table behind the boat and sell his squids as one of the fund raisers. I remember the first time George walked by and stopped at the table looking over all the squids and introduced himself. My dad had a bunch of unique west coast squids he had just gotten from Richard (Dick) Johnson. (For those of you that don't know who Dick Johnson was, he was another innovator in salmon trolling products. He was making and selling rotating flashers back in the 70s, maybe before that, I'm not sure). Anyway, George said something like, I have never seen those color patterns before, would you like to trade a few for some stuff you don't have on display? George took about a dozen squids and returned later with a bag of about 50 flies. Later that evening we went out to dinner together with George and his Brother and spent the evening chatting. Vince you are right, that was about the time he told us to try running just the fly inserts without the squids. He had experimented with that the previous summer but was keeping it hush-hush at that time. I think it was the next year he introduced his rigged flies. Each year after that, my father and him traded their latest creations when he returned to the convention center. When he stopped doing that show, I think my father and him kept in contact for a few years but then lost track of each other. I found a few more flies, some green glow flies, and some of the sparkle and crinkle variations. I remember George telling my dad his favorite was the sparkle fly with the three or four different colored beads. I sort of recall, humorously, that George didn't really like the way my father rigged his squids. One of the methods was to use a 4/0 true turn 2x catfish hook and a silver plated willow leaf blade. (He had those plated by the Sutton Spoon guy I think, but maybe I am wrong on that). The willow leaf would tuck up inside the squid body with the hook. Beads and a nose plug would keep the back of the hook and the tip of the willow leaf right at the end of the squid tentacles. The willow leaf had a really nice flash behind a dodger, looked just like a baitfish tail. George didn't like those because they didn't use any tinsel inserts, which he sold, and they caught a lot of fish! His brother Dave recently passed. I don't think my dad knew Dave as well as George, and I never had much contact at all with Dave. Here's a link about Dave Richey: http://record-eagle.com/local/x1912992397/Writer-dedicated-life-to-outdoors/print
-
I crawled around on of those at the Toronto Boat show. It looks like a much sturdier boat than your typical aluminum boat, though a little lacking in the creature comforts and fishing features found on many more traditional aluminum fishing boats like a Lund or Crestliner. My favorite was the toy hauler with the drop down bow, much like a WWII landing craft. Does Stanley make that model also, or was that from a competitor?
-
Started fishing at 9:15. Made 2 downwind trolls from Seneca shoal towards entrance buoy. First pass 1/2 of two person limit mostly worm harnesses. Purple, watermelon, green, dipsy with ring on 3.5 70ft out, 6 and 4 color cores, Overcast light conditions 1-3 footers. Picked up and ran back upwind a bit for another downwind troll. Second pass other 1/2 of limit mostly 5" minnow body baits of similar colors, same dipsy rigging, and 5 color core off inline planer. Rough water but fishable. Bright conditions 2-4 footers.
-
Has anyone determined what size Spro Swivel will allow you to make a double pass of 60lb through the eye of the swivel? And which style, "heavy" swivel or "power" swivel?
-
Woops, I discovered my link to the needle knot in my previous post was bad so I edited the post and corrected the mistake. Sorry about that.
-
Yep, 20-25 feet of leader works well. Here are a couple ways to attach your leader to your lead core: Willis Knot: http://www.youtube.com/watch?v=ge0VCeJOdc4 Needle Knot: http://www.youtube.com/watch?v=RBClN_Ck2zY Lead core to Swivel (I use a Spro) http://www.youtube.com/watch?v=4XkmHPX_mSk I think the best of the three is the third method using the needle with a swivel on both ends of the lead core.This method allows you to use tiny Spro swivels that will eliminate line twist in your rig. If you don't want to use swivels then either of the first two methods will serve you well. Here are some additional thoughts: I especially like how the guy in the needle knot video uses a needle and flame to melt the Dacron sheath to keep it from fraying. This is a great tip. It helps keep the end of the Dacron, where it is spliced to the backing, (which faces upwards towards our rod and reel) from getting fouled with fleas and makes it a lot easier to pass through our rod guides and reel's levelwind. I do this when I tie a Willis knot, I recommend you do this also. The needle knot works better than a Willis for tying braided super lines like Power Pro to lead core. I've pull-tested the Willis with super braids and have had it slip. I have not tried pull testing the double Willis on a knot tester with super lines; I hear that the Double Willis will hold super lines without slipping. (The double Willis is just two overhand loops instead of one cinched down about 1cm apart from each other). When spooling a reel and you want to use Power Pro for backing, use the needle knot to attach the core to Power Pro backing, and the "melted" Willis knot to attach your leader to the lead core. When spooling a reel and you want to use mono backing, use a "melted" Willis knot on both ends of the lead core. If you have to retie a leader on the water, do a standard Willis, but then redo the leader with a "melted" Willis back at the dock. One final thought; it can be quite difficult to get the Power Pro to pass through the lead core's Dacron sheath because it is so limp under compression. I found that if I apply some white water-soluble glue like Elmers Glue to the power pro and let it dry, it will become stiff enough to easily pass through the lead core’s Dacron sheath. Just make sure to pull the Power Pro through your fingers to remove all the excess glue, and lay it down straight on some wax paper or aluminum foil until it dries. If you’re in a hurry, you can use a hair dryer to speed up the drying process.
-
I was going through my Dad's old fishing tackle and came across a few Richey Flies. (I'm not sure if I have the spelling right as they were not in the original packaging). Am I recalling correctly that the man who made these was George Richey from somewhere in Michigan? It was probably 30+ years ago that my dad and him corresponded with each other and traded his flies for my dad's squids. Looking at them, I was thinking that the colors of flies he sold 30 years ago are remarkably similar to the "hot" flies of today. Given all the changes in the Great Lakes ecosystems over the past 30 years, history seems to have proven that Mr. Richey introduced many proven bait patterns that have stood the test of time. I wonder, is Mr. Richey still with us?
-
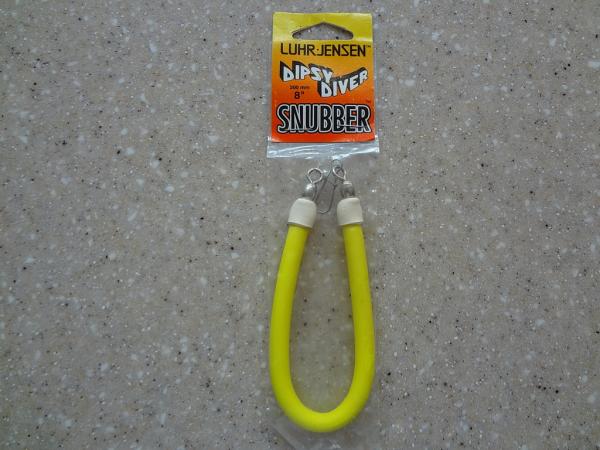 Snubbers are shock absorbing devices used in between your lure and a diver (attached to the rear of the diver). Asking if they are needed or not is sort of like asking Chevy or Ford... Proponents of snubbers will tell you that it helps keep rampaging hooked fish from using the weight and drag of pulling the diver through the water, from pulling the hook free of the fish. Many insist they are sure using snubbers helps them put fish in the boat and their landing ratio would suffer if they did not use them. Conversely, there seem to be just as many people who insist that if you use snubbers, they introduce a stretchiness between the lure and diver that prevents hooks from really getting buried deep into a Salmon's bony mouth and that they are sure that using snubbers looses them fish. There is a third camp of people who are somewhere in the middle. I guess I fall into that camp having spent many years running divers both with and without snubbers. I see the merits of the arguments of both sides. On my boat, my observations are that the successful hookup ratio using snubbers is less than going without. I think the landing ratio once a fish and has been on for a bit (10 seconds or more) is about the same for salmon, but higher for soft mouthed trout. So here's how I have my divers set up throughout the year. Divers that get Snubbers: 1) Red/orange divers specifically intended for surface oriented and feeding steelhead/rainbows have clear snubbers. If they are going to repeatedly shoot out of the water like a submarine-launched trident missile, pulling the diver clear of the water, wildly shaking their head, there is a high chance they will throw a hook so I feel the benefit of a snubber in this case will help to keep them hooked. 2) Divers specifically intended for Brown Trout where I am using light leaders have clear snubbers. From time to time, I will spend a day chasing Brown Trout and will rig my divers with 8lb leaders to pull a Sutton 44 flutterspoon / Eppinger flutter spoon spread. Brown trout can be very leader shy so I rig light line behind my divers. Browns have soft mouths compared to Salmon, so hook penetration is not so much of a concern to me as the possibility of larger Browns breaking the light leader is. On both of these I run the 11" light snubber from Big Jon. http://www.myfortune3cart.com/BigJonSports2011/product.cgi?group=693&product=983 Divers that do not get snubbers: Everything else the rest of the year.
 -
Wilson 7/4
John E Powell replied to MeanMachine's topic in New York Fishing Reports - Lake Ontario (South Shore)
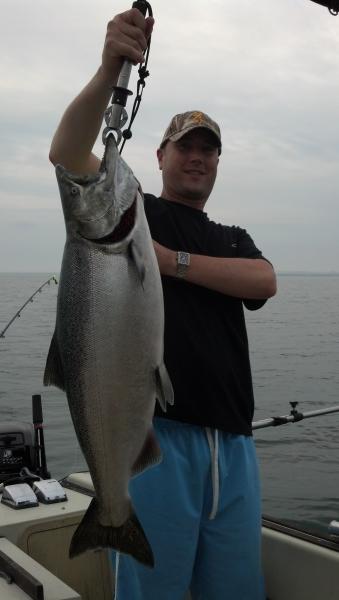 Sounds like a nice day, see you for the tourney.
 -
Is your outboard turning on you? If so, maybe you need to tighten the pivot point so it doesn't turn on you when you let go of the wheel. Autopilots can be fitted to smaller boats with outboard power at various price points. But you might also consider a corded or wireless remote steering controller.