
John E Powell
-
Posts
786 -
Joined
-
Last visited
Content Type
Profiles
Forums
Events
Gallery
Store
Everything posted by John E Powell
-
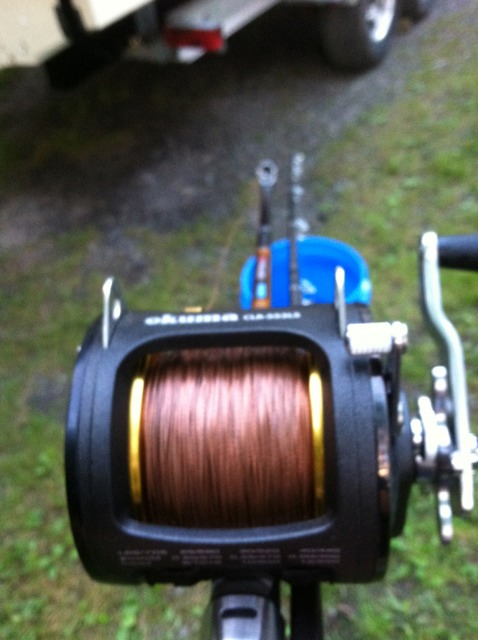 For spring kings and summer bows, look over the chart and select a 30lb. setup to target the 30-50 depths. At these shallower depths, choosing 30lb. copper will allow you to use a smaller lighter reel than the thicker and heavier coppers. Keep in mind that these depths on the charts were using a mag spoon and when using an attractor your depth will be 10-20% less due to the added drag. The Okuma Clarion 553 high speed is a great reel for this setup. If you happen to have a Convector already, you can change out the stock gears and install a set of Clarion gears. Upgrading to premium aftermarket carbon fiber drags at the same time would make some great reels for not a lot of additional money. The Tekota 700 is a good reel too, but do yourself a favor and change out the drags as the stock drag on the 700/800 reels is pretty bad; once upgraded, they are great reels. For summer kings, I would select a 45 or 60lb. copper to reach 50-70 foot and a 60lb. copper to reach the 70-90 depths. The big advantage of the heavier copper is that you have to let out less line (and reel less line back in) to get to the same depths. For example, I'd much rather reel in 400' of 60lb. than 600' of 45lb. You'll need a really large reel for the longer setup; Penn 345 and Okuma Solterra 50L. For me, The Tekota 800 doesn't have enough capacity to have adequate backing for a really deep rig. Other people here will disagree with me on this, but I want to have 200 yards or more of backing. I have a deeper rig than these, but it's a beast... Penn Senator with 500' of 60lb. copper and lots of backing. My point here is to suggest to you that you want to use reels with really large capacity to have adequate backing. For rods, I suggest no more than 7' for planer board rods, but 8-9 foot is better for a chute rod down the middle; the longer length makes it easier to maneuver around riggers when landing fish on other rods, but it will tire the angler more than a shorter rod and most people will find it heavy handed. The main reason most people hate the longer coppers is they are using inexpensive reels with slow retrieve rates and they are using rods that are too long that tire the fisherman more than the fish.
 -

Rod blanks for Laker jigging rods
John E Powell replied to uglyokuma's topic in Tackle and Techniques
I can help you find the right blank for any Great Lakes trolling application. Lots of choices for great downrigger rods. There are fewer good diver rod choices. Send me a private message describing what you are looking for and I help point you in the right direction. -
Tim Bromund of Olcott
John E Powell replied to Gill-T's topic in New York Fishing Reports - Lake Ontario (South Shore)
The last time I was out, I had a nice catch in front of Wilson. Others people had decent catches from a few miles east of Wilson through to half way between Olcott and the Somerset power plant. As long as winds haven't changed things, you can just go straight out and find fish. -
I always liked this quote from a notable Oak Orchard captain, "at this time of the year, fish the marks and you'll cord the sharks".
-
Tim Bromund of Olcott
John E Powell replied to Gill-T's topic in New York Fishing Reports - Lake Ontario (South Shore)
Tim is referring to the middle two numbers of Latitude on the North GPS number. As you head North out of Olcott, approx 43 20 000 N, the North Latitude # will increase. So Tim is recommending you travel well offshore (about 6-7 miles) until you reach the waters of 43 25 000 N, and set up there and begin trolling North until you find fish. Fishing has been great lately from the 25-29 lines. If you don't have a GPS, you might consider the Navionics mapping app for smart phones. -
Rod blanks for Laker jigging rods
John E Powell replied to uglyokuma's topic in Tackle and Techniques
Check out: http://rodbuilding.org/list.php?2 Down the left column of this page are many resources where you can find rodbuilding blanks and resources. This site is probably the best place on the internet to ask specific rodbuilding questions. -
Sea Bag Size to help with wandering problem. !
John E Powell replied to Xxx's topic in This Old Boat
I believe two smaller to mid size bags offer more flexibility to control your boat in varied conditions than 1 large bag. Put the bag out on the upwind side, and when you turn around switch bags instead of re-rigging it on the other side. Drop the second bag in to slow down on a big fish at netting time. Or, if you troll with a trolling engine mounted off center, put the bag on the same side as the engine. -
Returning to Maryland... can you tell us how you want to use these? Freshwater or saltwater?I would probably not use a level wind reel in saltwater. Are your 320s line counter reels or the regular reels? The 320 size frame would be fine in freshwater. A line counter is not an absolute necessity, but it helps you to both target and return to productive fishing depths. Without a line counter, you would have to mark the line at regular intervals or measure out line and count level wind passes across the reel ( or some other method). If it were me, I would only use line counter reels for wire diver fishing, like the GT320LC (if you prefer Penn reels)
-
Wanted looking for a Okuma Titus 50L levelvwind reel
John E Powell replied to Dreams Come True Charters's topic in Classifieds - Buy, Sell, Trade or Rent
http://www.ebay.com/itm/Okuma-Titus-T-50L-Lever-Drag-Fishing-Reel-T50L-Trolling-/370023535378 -
You may want to just give Airmar a call and talk to one of their technicians, I've found them to be quite helpful discussing the pros and cons of various transducers. For some boats, there are a lot of factors to consider that may limit your choices. What works well for one person or many people may not work well for your particular installation. I had a challenging installation and the often recommended 66 series and 260 series just wouldn't work for me. With the help of one of their techs, they determined the TM270W would be best for me. It was pricey, but it works incredibly well and I am very happy with the quality of my image.
-
Went out fishing on a friends boat who has not run snubbers for years. So he shows up and announces to the crew that he want's to give snubbers a try cause he thinks "they've come a long way from the soft tube snubbers with the braid inside that we used years ago." A hush fills the deck of the boat as the crew, stunned by this revelation, attempts to digest this bit of news; I think I managed to give a Spock-like quizzical raised single eyebrow and muttered something like ... but ... but ... Test conditions checklist: Two identical rigs consisting of Shimano Talora 7' roller diver rods, and Tekota 600LC reels, 19 strand torpedo wire, and mag size dipsy divers. One rigged with a snubber, one without. Both rigged with equal total leader length behind the diver. 8" Spin Doctors rigged with identical 23" fly leader lengths. Drags set just tight enough to prevent slipping, plus 1 arm of the star drag lever (to prevent slipping in turns). Hooks of tournament-rigged fly checked and all 4 hook points deemed "sticky sharp" on each fly (hooks recehecked and sharpened/replaced as necessary throughout test period) Water conditions were near calm at time of test. Also, it was noted that water conditions had been stable for a number of days preceding test and there was little to no significant current observed during the testing period. Target fish: Salmon. Linecounter readings between reels: held within 25 feet of eachother during time test was performed, but varied from 165-225 feet from the boat. Test results: Fish one, day one, snubber rig: Fish lost - approximate time from hookup to losing fish <= 2 seconds. Analysis: failure to set hook deeply in jaw of fish. Likely cause - crew agreed snubber, captain felt not enough info to determine cause at that time. Fish two, day one, clean rig: Fish landed. Fish three, day one, clean rig: Fish landed. Fish four, day two, snubber rig: Fish lost - approximate time from hookup to losing fish <= 1.5 seconds. Analysis: failure to set hook deeply in jaw of fish. Likely cause - crew agreed snubber, captain in a reluctant tone, agreed snubber. Fish five, day two, clean rig: Fish landed. Fish six, day two, snubber rig: Fish lost - approximate time from hookup to losing fish <= 4 seconds. Analysis: failure to set hook deeply in jaw of fish. Likely cause - captain and crew agreed snubber.No further data is available as testing called to a halt by the captain. The captain directed crew to "get rid of it" - "it" clearly being understood by the crew to be the snubber. Are snubbers worth running? You be the judge.
-
Where's the spot to start at?
John E Powell replied to markmonkey1's topic in Questions About Trout & Salmon Trolling?
The fish have been really biting well the past couple days. Run out to the 25.500 N line and set up there on a North troll. Yesterday, out of Wilson, we caught mature kings all through the 26-29 N line. Some good bait pods and active fish working them. Our last trip out we had fish on every rod in the boat. 300,400,500 coppers, 150-250 wire divers, 60-100 ft riggers. The stud of the day was 85' rigger with SD and A-Tom-Mik fly taking 3 matures and a teenager. Many other rods took 2-3 hits in 4 1/2 hours of fishing. At the same time, a friend started his N troll in 100 fow out of Olcott. He was fishless until he hit the 25.5 N line. By that time we were on our 9th or 10th. We heard similar reports from a couple charter captains who fished Monday and/or Tuesday. Big weather came through last night at my house, but I don't know if it went over the lake and changed the conditions or not. -
for sale : usa Revised and Reduced- 25' Grady White Sailfish/Closed
John E Powell replied to UpGrady's topic in Boats for Sale
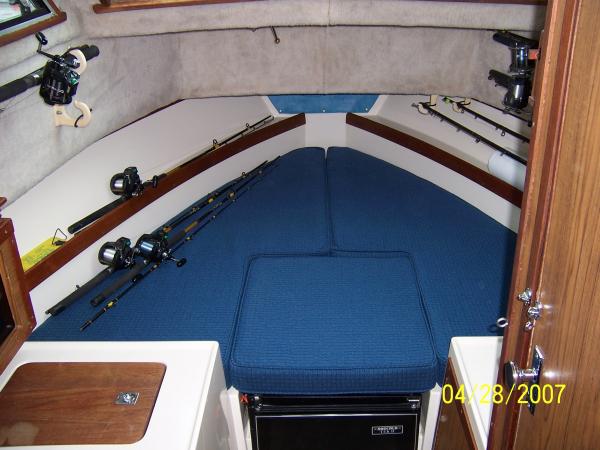 I had a nice Stamas a while back that had a similar large low engine box for twin I/Os. Placed a huge cooler up on it flush to the front of the box and cooler hinges rearward. With a pad, it made a great seat to fight fish from. Just enough room for your feet between the back of the cooler and the inside of the transom. My elderly father loved it, it extended our fishing together by many years. Once the fish was in the net, we lift and drop the fish right into the cooler for hook removal. We never had to worry about him sliding and falling on slimy decks. A quick spray with the wash-down hose would lean the area rearward of the cooler. I'd sometimes lean on or use the edge of it to catch my balance working lines in rough water. I suspect many people would look at an engine box as big as that and think that's just too much wasted space, but the cooler seat on the box really works well as an elevated fighting chair and turns the lost space into usable space. This should be a consideration for anyone looking at a boat with a similar dual I/O box layout. Nice looking boat at a fair price.
 -
What electronics do you consider "necessary" for Ontario trolling?
John E Powell replied to Sicarii's topic in This Old Boat
 You might want to take a look at Stanley Boats out of Canada. I saw either a 19 or 21 Islander dual console in the water at Toronto harbor a while back and it looked impressively well built looking at it from the dock. I also crawled around inside one of the larger models with a pilot house at the Toronto Boat show a couple years ago and left with a similar impression. http://www.stanleyboats.ca/stanley/islander.html
 -
Dipsey depth chart 2nd try
John E Powell replied to CaptSpike's topic in Questions About Trout & Salmon Trolling?
Thank you, much appreciated. -
What electronics do you consider "necessary" for Ontario trolling?
John E Powell replied to Sicarii's topic in This Old Boat
Clueless, really? Lying, really? Have an agenda, really? Wow... what a rude post. -
What electronics do you consider "necessary" for Ontario trolling?
John E Powell replied to Sicarii's topic in This Old Boat
I believe the Fish Hawk operates at 70kHz. It is a fairly unique marine sonar frequency and won't pose an interference problem with common 50/83/120/200 kHz sonar transducer frequencies. You may wish to consider, as part of your boat selection process, the ability to mount a high performance thru-hull transducer or in-hull transducer vs. a transom mount transducer for your main sonar unit. Generally speaking, a high speed thru-hull or in-hull transducer will perform better than a transom-mount transducer and would be more desirable from a performance aspect. For a fish hawk, transom mount will be fine. Hull design and trailer configuration will play a role in this. I would make sure to ask each boat manufacturer your considering about this. If they offer a thru-hull /in-hull location or "prep" for one, try to judge whether this is integral to the hull design or something they are willing to add on (I'd be very cautious of the latter). If you go to the Airmar website and study the information there, you can learn a lot about the options available to you. Then, when you talk to the boat manufacturers about what they have to offer, you will be well informed and able to make a decision that best meets your needs and the capabilities of your chosen hulls. I learned from experience, the hard way, by not doing this. I ended up having to spend a fortune on a transducer that both worked well with my unique boat hull and met my performance expectations. I was lucky that this particular transducer was available for my Garmin black box as it is not available for every sonar manufacturer. -
Which hooks are the sharpest and best way to keep them sharp
John E Powell replied to mcny's topic in Tackle and Techniques
Another excellent hook, besides the ones already mentioned above, are the Mustad Ultra Point KVD series treble hooks; right out of the box, they will stick into your thumb nail instead of sliding off. When I sharpen factory hooks I find I get the sharpest points with the least effort using a Luhr Jensen Hook File, but, I think it's just a matter of learning how to use whichever tool you choose. I keep one with the fixed handle in my tackle box at home, and one with the rubber tubing and snap on my pant's belt loop when fishing so it's always at hand; I can check and touch up every hook before it goes out. -
What electronics do you consider "necessary" for Ontario trolling?
John E Powell replied to Sicarii's topic in This Old Boat
Black Box - yes, there is no display with a black box, info is displayed on your chartplotter screen instead of a separate dedicated fishfinder display. If you buy a separate chartplotter and fishfinder, you can only display that devices data on that particular screen. There is nothing wrong with this approach, probably 90%+ of the boats fishing Lake Ontario are set up this way. But, if you go the black box route, you can send the sonar data to any network display. So, if later down the road you add a second display, you can display whatever data you want on either display. Some people set up two displays by the helm (even a third at the transom), others set up one at the helm and one at the transom. Going this route gives you flexibility. If you do go this route, I recommend you stick to one brand that has everything you might think you want down the road, (radar, autopilot, etc.) . Some brands with strong track records and complete product lineups include Raytheon, Garmin, and Furuno. Engine monitoring is a bonus as well if compatible. Traditional downspeed and temp probes are designed to be stand alone products. It may be possible for someone with extensive electronics capabilities to integrate a fully digital device like the Fish Hawk X4 to a network, but it doesn't seem like it would make sense to do so as you just have two data points, speed and temp, it's not like a sonar or chartplotter image full of data. -
What electronics do you consider "necessary" for Ontario trolling?
John E Powell replied to Sicarii's topic in This Old Boat
I think the first thing to consider when working with a clean slate is to decide whether or not to go with a network backbone (either NMEA 2000 and/or a mfg proprietary network). There are a lot of advantages to doing so. Namely, the electronics can provide data to each other. For instance, your gps can provide position data to your VHF in the event of an emergency when the distress button is pressed allowing search and rescue personnel to track and locate you more quickly. Network systems can be easily expanded or upgraded by purchasing modules that integrate with existing displays. Also, software patches and updates can be performed for all devices across the network (from the same manufacturer). Want to add an autopilot later on and have your GPS send position and steering data from a point you pick on your chartplotter to your autopilot? You'll need a network for that. If you go the network route, start out with choosing your Chartplotter/GPS as everything else will plug into this. Make sure you get a unit that has some method of applying software updates and patches like a SD card port, or via a cable and laptop computer. Add in a black box fishfinder and the best Airmar transducer you can afford. Then add your VHF to the network for distress position data and you have the basis of a good system that can be expanded in the future with AutoPilot, Radar, or even a second display. If you decide not to go the network backbone route and pick and choose separate items, most can still be connected to some degree, however, functionality is often limited and there will be no way to update items that do not have external ports or a method to connect to the internet. Make sure you get the VHF fed with position data if nothing more (or buy a VHF with a built in GPS). On my boat, I have Garmin proprietary network and a NMEA 2000 network. I have two displays an 8" and a 12", radar, black box sonar, and VHF all connected. When there is a software update, I download the patch to a SD card and take it to the boat. I power up all the units, slip the card into either of the chartplotter sd ports and it asks me if I want to perform an update, I select yes and everything connected to my network (except the non-Garmin VHF) is automatically detected and updated. It takes about 2 minutes start to finish. I can see any combination of chartplotter, radar, radar overlayed on the chart, and sonar (single dual, split, a-scope, whatever) on either of the displays because they all share the same data over the network. This fall, I will be upgrading with a new autopilot that will be added to the network (pick a point or create a trolling route on the chartplotter and engage the pilot). Lastly, outside of the network, I would consider a downspeed and temp probe mandatory electronics and part of any good electronics package. Order of importance to me: VHF (for safety), Chartplotter/GPS, Downspeed and temp, Sonar/fishfinder, second display, Autopilot, Radar. -
300 copper - keeping everything else clear?
John E Powell replied to jonboat's topic in Tackle and Techniques
Church TX-44 Super Planer http://www.churchtackle.com/product%20pages/planer_boards/tx-44_super.html If you are only going to run one, set it up to run off the opposite side of the boat you steer from so it is easy to see from the driver seat. (For most people with right-side steering, this will be set up as a port side board) You can also use a large 4-5" foam bobber with a pad style release to affix the bobber to the line (with a center pin that prevents a release). For either of these, I rig the reel as follows. A layer of mono on the spool (to keep backing from slipping on the spool), spliced to power pro backing with Albright knot, #8 Spro Power Swivel, 10' of 40lb Big Game (where board or bobber attach to the line), another Spro, then copper, another Spro, then Fluorocarbon leader. To rig for fishing, let it out and attach either the TX-44 or the float to the section of big game. The TX-44 comes with a reversed release that does not release, it acts as a hold in place clamp. With the bobber, place your main line in past the center pin of the pad release so it won't release. If you don't have a pad release with a pin, then affix the float with a clip to hold to the line and a pad release to hold it in place on the line. Let both straight out the back. With the TX-44, apply just enough tension to keep the float upright but not so much to cause it to start pulling off to the side. Let the float back about 150-200' down the chute. With the TX-44, at about 100' stop letting line out and the planer will go off to the side. For the float, you can manage fish caught on other rods by hitting the freespool on the chute copper until the float is 3-400 foot behind the boat, then re-engage it. This will be sufficient to land most fish on other rods. For a really big king fall king, just reel it in and get it out of the way. Either way the planer board or float act to keep the lines separated from each other, the planer off to the side, or the bobber behind the boat. The TX-44 are good until whitecaps begin to show up, after that, just stick with a float bobber down the chute as it will fish in any water. -
Go with a Spro Power Swivel, size 8. Tiny and more than strong enough, and will go right up through your guides.
-
A good place to start is with an 8" rotating flasher with 23" of leader from the front of the fly to the loop that attaches to the flasher. The three basic flasher blade colors are white, green, chrome/silver. Basic fly combinations will have mixtures of white/pearl, chrome/silver, chartreuse, green, blue, and glow. Picking a flasher with tape and then matching it to a fly or vise versa is a good way to begin building your stock. Tournament rigged (one each treble and octopus hook) is the most popular rigging. Better fly will be rigged this way with premium quality hooks. For what it's worth, looking through my box and the boxes of people I fish with, about 3/4 of the flashers we use are Spin Doctors and maybe 90% of the fly are A-Tom-Mik.
-
Forgot to mention, don't start with wire directly on the spool as it will slip if you get down real low. Make sure you get at least 1 complete layer of monofilament down first. Use an Arbor knot to tie the mono onto the spool. http://www.animatedknots.com/arbor/index.php?Categ=fishing&LogoImage=LogoGrog.jpg&Website=www.animatedknots.com Wind on enough mono to completely cover the bottom of the spool. Then splice the wire to the mono using an Albright knot http://www.animatedknots.com/albright/index.php?Categ=fishing&LogoImage=LogoGrog.jpg&Website=www.animatedknots.com In the animation the wire should be the white rope and your monofilament should be the blue rope. Also when working with wire, at step #3 in the animation, bend the wire around a small diameter nail or similar round item to put a small tight radius loop in the wire to help prevent kinking the wire when you cinch down the mono onto the wire as you tighten the knot.
-
When I read your post two things came to mind. First, when you fill a trolling reel with any line, place something round through the center of the spool to act as an axle and make sure line comes off the top of the spool as it rotates. If you are filling the reel indoors, mount it in the back half of a rod, if outdoors you can put it on either the back half or a whole rod. Run the wire through your guides and levelwind and spool it on.Now, for the part I think you missed. The problem you are experiencing happens because you let out, for example, 200 ft of wire then you catch a fish and the 200 ft of wire gets reeled back on under a lot more tension than you originally put it on. The tight wire slips between the looser spooled wire beneath it and you end up with the mess you described. With wire, it's important to let out all the wire out on the water and reel it all back in under heavy tension. This will prevent the loops of wire from forming on your reel. Get yourself a 1lb drop weight sinker and the next time you go to the lake, head out to deep water (200 ft plus is good). Set your boat speed to about 4-5 mph. Zero your linecounter, attach the weight to the wire, and let all the wire out. As you begin to reel the wire back on, make sure to increase your boat speed to apply at least as much tension as a large salmon. You should have to tighten down the drag and really winch the weight back in. When ou get the weight back in, check your line counter. I usually find 30-50 ft discrepancy. The reading on your line counter will be how much slack line was on your reel from spooling it. Do this with any non-stretch wire or braided line. It doesn't matter if the line was machine-filled and hand-filled. Once reloaded under the proper tension, any looseness from handling in the back of the boat or loosened drags in storage won't be a factor because the looseness wont extend down into the tightly wound wire any appreciable distance.