
Todd in NY
-
Posts
2,484 -
Joined
-
Last visited
Content Type
Profiles
Forums
Events
Gallery
Store
Everything posted by Todd in NY
-
It Appears Lake Ontario Has Reached It's Peak Level For 2021
Todd in NY replied to Todd in NY's topic in Open Lake Discussion
 l wonder how long it will take the IJC to drop the lake 5 cm.
 -
It Appears Lake Ontario Has Reached It's Peak Level For 2021
Todd in NY replied to Todd in NY's topic in Open Lake Discussion
Don't worry, next year the lake will be 4ft higher. They'll show us... -
It Appears Lake Ontario Has Reached It's Peak Level For 2021
Todd in NY replied to Todd in NY's topic in Open Lake Discussion
The IJC won't let that new water level go to waste by keeping the lake level up, even if it's just an inch or two. They see it as an opportunity to increase outflows. We've all come to expect nothing else from the IJC. -
Thank you. It won't happen this year because I've been putting money into my row boat. I'll need to buy a new steering cable to go along with the autopilot as well. Lowrance recommends a new steering cable, but NOT one of the "No Feedback Steering" cables.
-
They did a few years ago when I looked into getting one.
-
I forgot to mention that my steering is cable steer, not hydraulic.
-
Thanks for the info! I didn't know Simrad made an autopilot similar to the Lowrance.
-
What is the Precision 9 Simrad?
-
I don't doubt that one bit. I know I won't regret the purchase.
-
I'm still on the fence about getting the outboard autopilot. I know it will work with my HDS9 Gen3, but there is someone at the helm 99% of the time anyway. But it would come in handy when there's only two people on the boat.
-
Minn Kota Terrova On A Row Boat, and Much More
Todd in NY replied to Todd in NY's topic in This Old Boat
 This pic shows the transducer cable running along the bottom on the rear bench seat, secured with screw-in zip ties This pic shows the Penn riggers mounted. Each rigger turns forward, then out to the sides 180 degrees for use The major work is done, but there are some smaller projects on the horizon. Thanks for following, tight lines!
 -
Minn Kota Terrova On A Row Boat, and Much More
Todd in NY replied to Todd in NY's topic in This Old Boat
After bolting the board onto the mounts, I added the white lure/cup holders to the front of the board The heading sensor came with about 12ft of wire. Rather than cut the wire shorter, I routed the wire under the deck board and along the rub rail with the 6ga wire. I also re-routed my transducer cable along the front of the rear bench, then along rub rail with the other wire -
Minn Kota Terrova On A Row Boat, and Much More
Todd in NY replied to Todd in NY's topic in This Old Boat
After removing the board from the Eagle Feet mounts, I had to remove the downrigger bases and other accessories I set the old board on top of the new boards, all clamped together, to use the old board as a template for the screw holes in the 2 deck boards I assembled the downrigger bases on the new deck boards first, then added the aluminum yard stick, heading sensor, then drilled two holes 10" to the right and left of center, to help hold the 2 boards together in the middle. All larger fasteners are stainless 1/4-20 machine screws with 1" and/or 1.25" fender washers, lock washers and nuts. Because I drilled more holes through the deck boards after bolting the rigger bases on, I used a flathead screwdriver to gently pry the boards apart, then used a small framing square to push the new shavings out from between the boards I then secured the two "middle" bolts. Now it's time to bolt the board back onto the Eagle Feet mounts. -
Minn Kota Terrova On A Row Boat, and Much More
Todd in NY replied to Todd in NY's topic in This Old Boat
Made a lot of progress today. I made the red (positive) 4ft lead wire, which will go from the circuit breaker to the battery. I crimped these connectors with my 6" bench vice, and WOW, it works much better than my drill press vice! Then heat shrink to finish it off I mounted the heading sensor on this old 2x6, but I decided it was long overdue to replace this board with the composite deck boards I bought specifically for this purpose This board is held onto the boat by using a brand of clamps called Eagle Feet. They've been on this boat, with this board, since I bought them new in 2016. The 2x6 was some scrap wood I had laying around back then, so it's time is up Of course, this means I have to cut the wire connectors on the heading sensor wires because they won't slide through the hole I had to drill in the 2x6 before adding the connectors -
Minn Kota Terrova On A Row Boat, and Much More
Todd in NY replied to Todd in NY's topic in This Old Boat
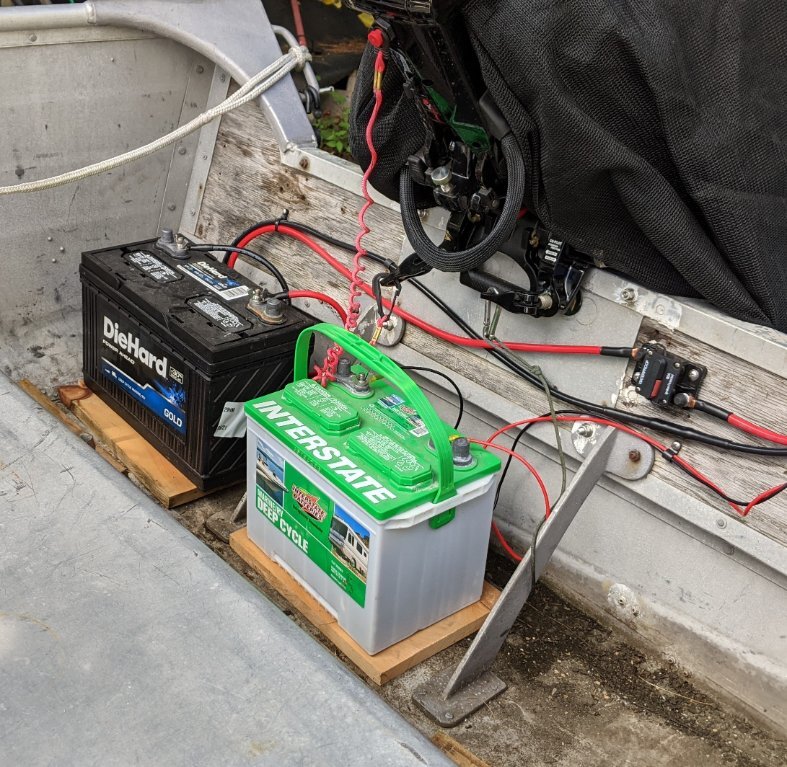
I installed a Minn Kota 60 amp circuit breaker, MKR-19, on the transom. I cut the red wire, attached shrink wrap and a copper battery terminal, used my 4" drill press vice to crimp the battery connector, and connected it to the circuit breaker Then I messed up and cut the black wire the same length. So I used a blue connector, heat shrink and the drill press vice to add 4ft of black wire, then a battery connector to the end. The battery will be on the starboard side, at the transom -
Minn Kota Terrova On A Row Boat, and Much More
Todd in NY replied to Todd in NY's topic in This Old Boat
I did some time-consuming tedious work yesterday. I drilled holes just under the rub rail on the port side, every 12", and used #8 screws, flat washers and nylon lock nuts to hold zip ties in place. I zip tied the 6ga wire along the rub rail. It's heavy wire, and spacing the zip ties more than 12" apart (like 24"), the wire sagged too much -
Minn Kota Terrova On A Row Boat, and Much More
Todd in NY replied to Todd in NY's topic in This Old Boat
Making slow progress due to the weather and my busy work schedule. Today I connected the leads from the trolling motor to the 6 guage wire that will connect to my battery. I think the factory leads are 10ga, but I'm not sure. My first attempt at using a 6ga butt end connector almost worked, but the wires pulled out of the connector. I squeezed the wire crimps as tight as I could, but it wasn't good enough My 2nd attempt was using a center punch to tap the connector closed. That failed as well. My 3rd attempt was with my 4" drill press vise. My bench vise would've been much better, but the wire wouldn't reach that far. I put the wire inside the connector, one side at a time. I then taped the wire and connector together, then carefully repeated on the other side I then squeezed the whole connector in my vice as tight as I could I then slid the 1/2" diameter heat shrink tube over the connector and used my heat gun on low heat to set the heat shrink -
 My old paint is literally chipping off in tiny pieces. It won't serve as a good base unless maybe the first coat of paint isn't chipping.
 -
Thanks! Mine is a 1974 boat. I thought about using the Rust-Oleum self-etching primer. It's OD Green, and that's what color I want to paint it anyway. But the hardest part will be removing 3-4 layers of old paint first.
-
Great job on the boat! What kind of paint did you use? My 15ft sears row boat needs a paint job.
-
Minn Kota Terrova On A Row Boat, and Much More
Todd in NY replied to Todd in NY's topic in This Old Boat
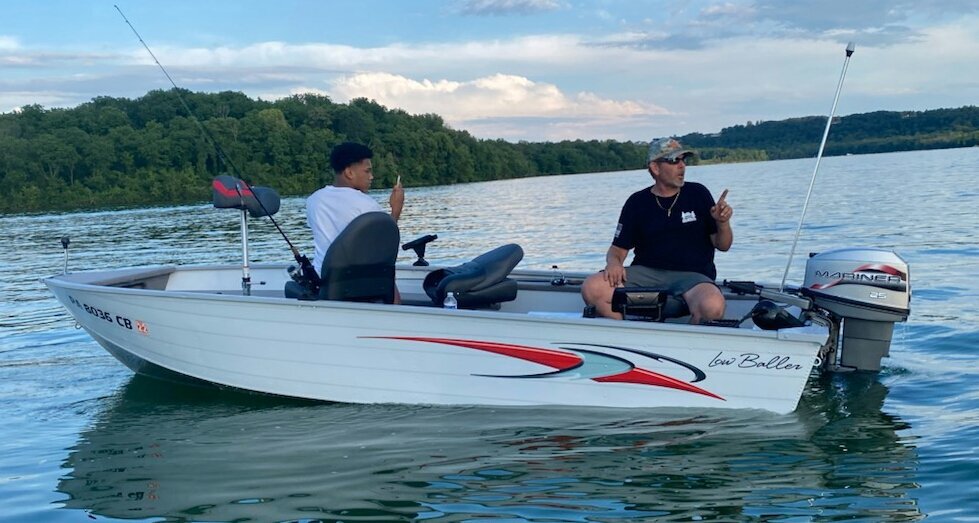
I'm looking forward to having spot lock. Every time I go fishing, I mark fish on or near the bottom, but dropping an anchor is just too inconvenient if the wind isn't just right, or there is a rocky bottom. I've lost at least 2 anchors in the last 5 years because of rocky bottoms. This Terrova will greatly enhance my fishing. I run my fish finder on a size 24 battery, and I bought a size 29 battery for this Terrova. My 15hp Mercury tiller motor doesn't have a charging system. I figured I might as well document this project here so other members can see how I did it, and maybe generate some ideas for someone else to us on their boat. I hope to get the wiring done today. -
Minn Kota Terrova On A Row Boat, and Much More
Todd in NY replied to Todd in NY's topic in This Old Boat
The Terrova that I bought is the 12 volt, 55lb thrust, 54" shaft model with no foot pedal, but it has the i-Pilot remote. I was leaning toward the 48" shaft, but I decided on the 54" instead. The wind always seems to be blowing in northern NY, and I don't want my motor coming up out of the water. -
Minn Kota Terrova On A Row Boat, and Much More
Todd in NY replied to Todd in NY's topic in This Old Boat
Now it's time to set the trolling motor on the deck and figure out what position is best for mounting it. I wanted to make sure the motor didn't stick out past the rub rails I also had to make sure there would be enough clearance between the rub rail and the motor shaft, no less than 1.5". Got the position I wanted, then marked & drilled the 4 holes. The two front holes ended up being too far forward to use I used a piece of leftover composite deck board for the backing material under the cast aluminum bow brace The motor was shipped with six rubber spacers and six 1/4" x 1" fender washers that can be used for making sure the motor sits level on the deck. It also came with 6 mounting screws that are 1/4" x 2" long, but I had to use my own 4" & 5" long 1/4" bolts. I also added some of my own 1/4" x 1.25" fender washers to raise the rear of the motor mount about 3/4" off the deck to make the motor as level as possible I added a TH Marine G-Force Eliminator prop nut More to follow after I install the wiring and the heading sensor puck. -
 Thanks! I was asking out the Stony Creek public boat launch just south of Henderson, NY.
 -
Minn Kota Terrova On A Row Boat, and Much More
Todd in NY replied to Todd in NY's topic in This Old Boat
I bought 3 pieces of aluminum bar stock, 1/8" thick & 3ft long. Two pieces were 2" wide and one piece was 1.5" wide. It's all Lowes had in stock, so that's what I bought. I needed to fill the gap under the back of my deck piece, as well as add much strength and rigidity to the deck to support the 65 pound trolling motor The next step after bolting all the aluminum bar stock to the plywood was to bend each piece, on by one, over the rub rail. I used a crescent wrench, then finished the bends with a rubber mallet so I wouldn't damage the bar stock or rub rail I then held the pieces together with vise-grips so I could drill through the bar stock and the boat, just below the rub rail where there are 3 layers of aluminum The first bolt I installed was the bolt on the forward edge of the plywood. That bolt allowed me to pivot and center the board before attaching the other bolts. EDIT TO ADD; this forward bolt is placed on the starboard side of the deck so it doesn't interfere with the trolling motor mount.
