
Todd in NY
-
Posts
2,484 -
Joined
-
Last visited
Content Type
Profiles
Forums
Events
Gallery
Store
Everything posted by Todd in NY
-
Transom Replacement, Crestliner SST Transom
Todd in NY replied to Todd in NY's topic in This Old Boat
 Thanks for the information Frogger! The marina will do the transom this winter inside their shop. They've used it before, so I'll let the pros handle it. Then they can mount the new motor after the do the transom.
 -
Transom Replacement, Crestliner SST Transom
Todd in NY replied to Todd in NY's topic in This Old Boat
I dropped my boat off at the marina last week. The owner says he thinks using Seacast in the transom instead of wood or Coosa would be my best option. I like the idea of Seacast, but no decision has been made yet. I'll update this thread when the next step is complete. -
for sale : usa Evinrude 150 Motor For Sale, For Parts $300
Todd in NY replied to Todd in NY's topic in Classifieds - Buy, Sell, Trade or Rent
 You're right, I just don't have time or desire to mess with it. If I have to store it in my neighbor's barn all winter, that's ok too.
 -
for sale : usa Evinrude 150 Motor For Sale, For Parts $300
Todd in NY replied to Todd in NY's topic in Classifieds - Buy, Sell, Trade or Rent
Bump with a lower price. -
Transom Replacement, Crestliner SST Transom
Todd in NY replied to Todd in NY's topic in This Old Boat
I got the 7/8" piece of transom wood out today in one piece. It wasn't easy, and it was painfully time consuming, but I was able to save the thick sheet of plywood to use as a template. I ended up buying an 18" long 1/2" diameter drill bit. I drilled countless holes straight down into the 5/8" piece of plywood, and also drilled holes on various left and right angles, being careful to not mess up the 7/8" piece of plywood. So here is the 7/8" piece of plywood, in one piece. At this point I was able to pull the plywood out by hand. Next step is to make the new transom board. -
I used a helicoil to fix my upper drain/fill hole. It works, and it's probably your best option. I think I bought a 6 pack with a kit from Amazon.
-
Transom Replacement, Crestliner SST Transom
Todd in NY replied to Todd in NY's topic in This Old Boat
I didn't work on the transom on Friday, but I did make some small progress on it today. I used the electric chainsaw for awhile, but by the time I noticed the small wire brads holding the 2 sheets of plywood together, my chain was dull, because I probably hit all of them. I don't know how many I hit, but I wasn't expecting to see wire brads in the transom wood. I decided to remove all of the thinner sheet of plywood, piece by piece with a hammer, chisel and pry bar. It's working, but it's tedious and painful for my carpal tunnel, osteoarthritis and tendonitis. Yep, 20 years in the Army Light Infantry has my joints all screwed up. Oh well, I'm used to after all these years. -
Transom Replacement, Crestliner SST Transom
Todd in NY replied to Todd in NY's topic in This Old Boat
I was hitting the transom with a rubber mallet as I was pulling upward with the crane hoist. I repeatedly hit all four sides of the SST where the wood was in contact with the aluminum. The wood appears to be sandwiched real tight on the far left and the far right. I feel very confident that I can use my electric chainsaw to remove one width of the chain through the narrower sheet of plywood, and still pull the thicker sheet out in one piece. It's waterlogged, but not quite rotted. I'll try this tomorrow and post my results. -
Transom Replacement, Crestliner SST Transom
Todd in NY replied to Todd in NY's topic in This Old Boat
My electric chainsaw stops as soon as I release the trigger, unlike my gas chainsaws. I usually cut down 20-25 trees every year, then limb and buck them to firewood length, so I'm confident in my chainsaw skills. I plan on spending Friday on the transom removal. -
Transom Replacement, Crestliner SST Transom
Todd in NY replied to Todd in NY's topic in This Old Boat
I've removed every bolt and screw in the transom, as well as the 2 drain holes. I removed every bit of foam that was blocking my access to the bolts that were holding the wood in place. I'll check out iboats tomorrow. When I do an internet search for a transom replacement for a Crestliner Sabre SST transom, I don't see anything that could answer my questions. I'm a research-aholic, but I've come up empty in my search for a similar boat transom replacement. -
Transom Replacement, Crestliner SST Transom
Todd in NY replied to Todd in NY's topic in This Old Boat
I made no progress today. I tried pulling with 3/8" x 4" long eye bolts, and they pulled out of the wood. Of course I drilled a pilot hole before screwing the eye bolts in, and I screwed the eye bolt all the way in. So I went to Tractor Supply and got 2 eye bolts 3/8" x 8" long. Still had no luck. I pulled the eye loop open 3 times (at least once with each eye bolt) and even managed to pull one of the 8" eye bolts out of the transom. I was lifting the back of the boat, but that transom wood would not budge. The wood is wet all the way to the bottom. It probably swelled up like a sponge over the years. It looks like Crestliner used a sheet of 7/8" plywood, and a sheet of 5/8" plywood to get their 1.5" thickness. The two sheets are separating from each other. My next plan is to use my 16" electric chain saw and gently, slowly, and very carefully remove some of the thinner sheet of plywood. I also thought about squirting some dish soap down between the wood and the aluminum, to see if that might help. I work tomorrow and Saturday, so I don't know when I'll get back to this project. I'll post updates as soon as I get around to it. The strange part about this rotten transom is that it did NOT flex at all. Those 10 carriage bolts really held that transom together, even with wet wood in the transom. That's impressive! -
Transom Replacement, Crestliner SST Transom
Todd in NY replied to Todd in NY's topic in This Old Boat
Rolmops, I feel your pain. I'm glad you made some progress with your transom. What a mess you found and dealt with. -
Transom Replacement, Crestliner SST Transom
Todd in NY replied to Todd in NY's topic in This Old Boat
I'll be using some 13 ply mahogany marine grade plywood. I thought about using Coosa Board, but I don't know enough about it. According to the marina that I'm buying the motor from, this is the only wood he uses in transoms, to include his own boat that he is doing this winter. I was able to squeeze water out of that foam like a sponge. My wife couldn't believe it. The foam I removed probably weighed 75+ pounds. -
Transom Replacement, Crestliner SST Transom
Todd in NY replied to Todd in NY's topic in This Old Boat
Thanks! -
Transom Replacement, Crestliner SST Transom
Todd in NY replied to Todd in NY's topic in This Old Boat
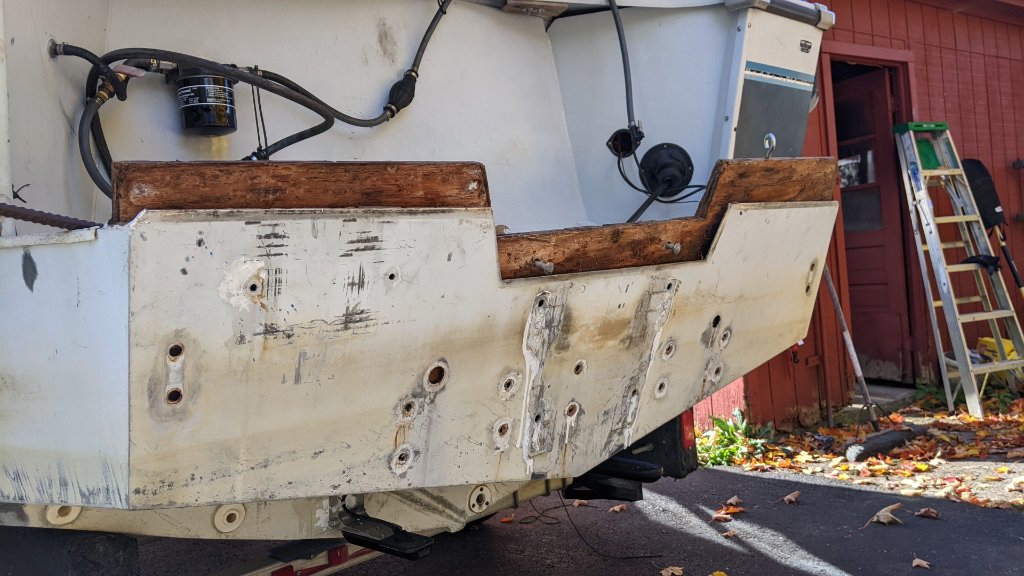
Today I worked between periods of rain to remove the transom cap and all of the bolts that run through the transom. This took all day. I removed the stainless stern tow eyes first, then the aluminum drain holes, then finally the 10 carriage bolts. This is where the real education started... I removed the entire round access cover and discovered flotation foam and an aluminum divider inside the transom. I wanted to remove the transom cap first, to see the condition of the wood core. It was in better condition than I expected, but it's still getting replaced. I put the transom cap back on because it started raining again, and I didn't want the transom wood to get any wetter than it already was. The foam was saturated with water, so I removed all of the foam. This gave me access to 6 of the 10 carriage bolts. An aluminum divider was blocking my access to the last 2 bolts on the left, and another divider was blocking my access to the last 2 bolts on the right. The center divider and the other 2 dividers were bolted to the main transom with 3 bolts each. I removed the bolts, then had to removed more foam from the center compartments because the aluminum dividers fit pretty snug inside the SST transom, and I couldn't lay the dividers down to get access to the next 2 compartments. It seemed like the foam was glued to the floor in the transom, and it was difficult to remove with scrapers. Once I had most of the foam temoved from the 2 center compartments, I was able to adjust the left divider, only to find more foam. I removed the foam from the 2nd left compartment and finally had access to the 2 far left bolts. I then repeated these steps in the right compartment and removed the 2 far right bolts. I removed enough foam to nearly fill two 50 pound bird seed bags. I'm done for today. I'm leaving the cap on the transom overnight. Tomorrow I plan to use my Maxxhaul crane to remove the wood core, hopefully in ONE piece! -
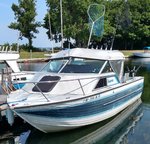
It's time to repower my boat, so I figured I might as well replace the transom first. I've never done a transom Replacement, but it doesn't seem like it will be rocket science. The boat is a 1988 Sabre 220. I removed my Evinrude 15hp kicker motor last week so I could winterize it and store it in my garage. I started by removing my old 1989 Evinrude 150. I have a 1,000 pound hoist, but I don't have a place to attach the hoist for this project. So I assembled my Maxxhaul receiver hitch mounted crane. It wasn't ideal, but it worked. I put the motor on a pallet so I could put the motor in the bed of my truck.
-
for sale : usa Evinrude 150 Motor For Sale, For Parts $300
Todd in NY replied to Todd in NY's topic in Classifieds - Buy, Sell, Trade or Rent
Bump... lower price -
 Congrats on your successful first trip!
 -
 Thanks for sharing! I never knew him, but I couldn't help but notice how young he was. Prayers sent for a fellow veteran...
 -
for sale : usa Evinrude 150 Motor For Sale, For Parts $300
Todd in NY posted a topic in Classifieds - Buy, Sell, Trade or Rent
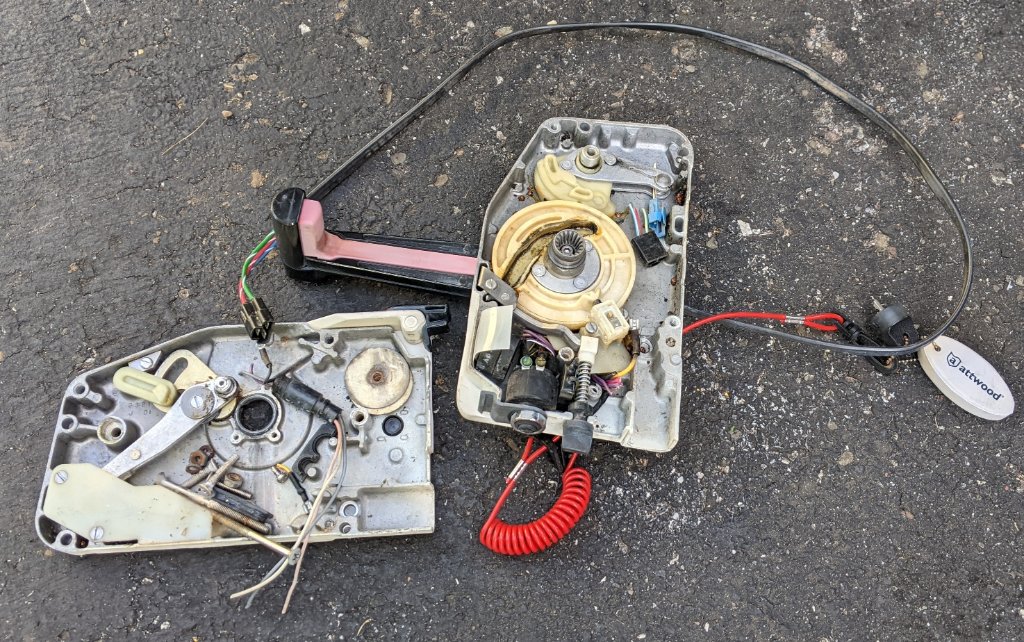
I am selling my 1989 Evinrude 150hp motor for parts only. The motor seized up this year and I've decided to repower with a new motor. This motor was running as smooth as silk when it seized up, and was pumping good water, so I don't know what went wrong with it. The cowl is in good shape, as are the 3 carbs and power packs. It has a new solenoid that was only used once. It has an older starter, and all of the controls and cables are still attached to the motor. The hydraulic tilt & trim system works perfectly. There are too many good, working parts to list here. The motor is on a pallet in the bed of my pickup truck. I'm willing to deliver it for an additional, reasonable fee if you have a forklift or a hoist to get the motor out of my truck. My truck is diesel, and diesel isn't cheap. I'm asking $300 for the motor, cables and controls. Contact me by PM here if you are interested. Cash only. New information added 9/25/22: The VRO pump was removed by a previous owner, so the motor has been running on a pre-mixed 50:1 fuel/oil mixture. Make a reasonable offer. The worst I can say is no. -
Thanks for the link.
-
No idea, but my Sabre 220 has one tank that holds 41 or 42 gallons. My 220 measures 23' 5" with the SST. It's an outboard model. I wonder if they hold 25 gallons each.
-
Sold / Closed 1986 Sportcraft 250 Hardtop Fisherman
Todd in NY replied to rustyhook1971's topic in Boats for Sale
 This boat sold in 2020
 -
Is Lake Erie As Low As Lake Ontario?
Todd in NY replied to Todd in NY's topic in Open Lake Discussion
We are all well aware how the IJC can't do anything right with our water levels, and that Lake Erie has no man made controls like the Moses Saunders dam. Our inland ponds and wetlands are drying up due to high temps and lack of rain. I'm talking about ponds and wetlands that are not connected to Lake O/SLR in any way. Our rivers that feed into Lake O are below normal water levels as well. I hope it doesn't have a negative impact on the spawn this fall. -
Is Lake Erie As Low As Lake Ontario?
Todd in NY replied to Todd in NY's topic in Open Lake Discussion
Thanks for the info on Lake Erie. I heard a rumor that Lake Erie was currently experiencing lower than normal water levels, and people were using that as an excuse for why Lake O was lower than normal. It's been a hot dry summer around the Watertown area, yards are brown instead of green.
