

Big Dave
-
Posts
2,748 -
Joined
-
Last visited
Content Type
Profiles
Forums
Events
Gallery
Store
Everything posted by Big Dave
-
Setup/ Leadcore questions
Big Dave replied to howboutthosemets's topic in Questions About Trout & Salmon Trolling?
I have heard that a paper bag under your shirt against your chest helps. The bag rubbing takes your mind off the motion of the boat. Haven't tried it though. I took a guy out from work one time on a FLAT lake no ripples at all and he was a mess.. I don't know what he would have done in waves. -
Finger Lakes Trolling Association Flea Market Roll Call
Big Dave replied to Iron Duke's topic in Finger Lakes Discussion
Raffle tickets !!!! -
Setup/ Leadcore questions
Big Dave replied to howboutthosemets's topic in Questions About Trout & Salmon Trolling?
I would do the swivel seat for the helm also. That way you can watch the lines too. With even just two riggers you can get six lines out easy. Two dipsies on the wire, four lines on the riggers . Two at the ball and two stacked above. Than you can pull one of the stackers to run a flat line in the spring or the leadcore later in the year when the water warms.Throw in some fixed or free sliding cheaters and you can get lots of baits into the mix. Put a rigger on each corner and the dipsies up 4' or so ahead of the riggers. I would never take the dipsie rods out to run a core. You need to look at other boats and sit in yours to figure what layout will work the best for you. -
How do you catch them?? Troll a salmon?
-
Wanted Rubber tangle free landing net
Big Dave replied to Wrestling Coach's topic in Classifieds - Buy, Sell, Trade or Rent
Bass pro has a nice replacement net with the small holes, rubberized netting . Replace the netting on yours. -
Small snaps and SPEED are important. Sticks work ok at slower speeds some spoons have differant speeds that they work at.
-
Ours broke loose with a braid dipsie. It would reel than slip , reel than slip. Only to get worse so we had to hand line the dipsie in as one of the guys reeled the line in. Glad we didn't have a hit during this ordeal!!! It was summer so it wasn't the temp. bothering it. The plastic spool is glued to the stainless steel shaft. With wire or braid there is no give when you get a hit. Tuna tom drills a small hole and puts a pin in , now you have a stud to tie off to when spooling up the reel.
-
The spool may have come loose on the shaft that runs through it. Tuna Tom pins it when he goes through the reels. Had that same problem with a greatlakes 47lc. and it was the spool.
-
Cannon had them years ago that were susposed to snag less when banging bottom.
-
flasher/fly rigs on the smaller fingerlakes
Big Dave replied to zackblain's topic in Finger Lakes Discussion
 10# is to light for the flashers and flies!! They pull harder than a spoon and If the line twists they will be gone, and thats pricey. Those trout think they are and on the big lake and will smack them. A green protroll and uv green fly, White with a mirage or white fly are a good place to start. Like the others have said a wire dipsie rod won't disappoint.
 -
Way to go !! Glad to read a fresh report , Thanks.
-
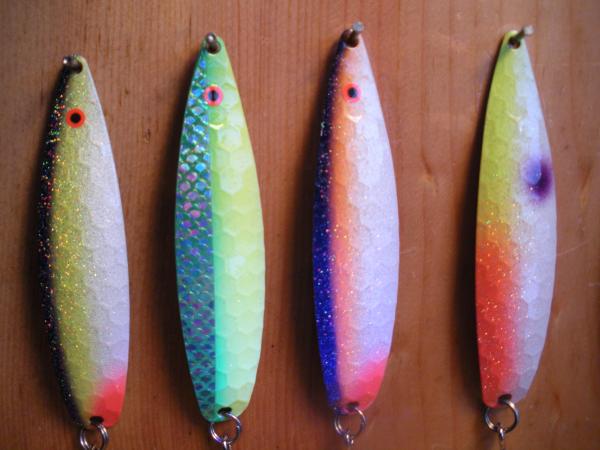 Orange shad and magetta shad. I like some of the green pattrens too. That rootbeer and tan. The lemonlime should be goood as some of the metalic colors. They realy light up with the UV light.
 -
the counter gives you a spot to reset. Its aproxament not exact. 180 on my diawia might not be the same on the okuma reel to get to 60' down on a #3 setting. You will get the hang of your stuff by using it. You will like the wire
-
For Sale : USA Lot 3 Spoons
Big Dave replied to Missdemeanor's topic in Classifieds - Buy, Sell, Trade or Rent
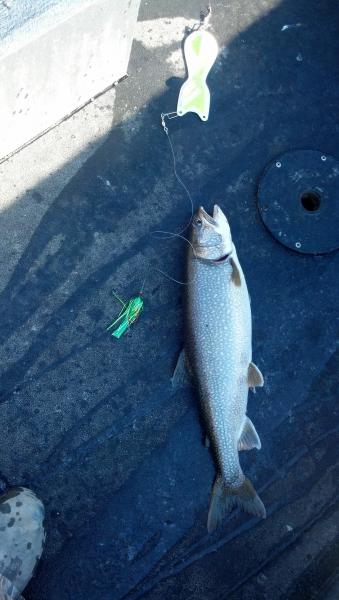
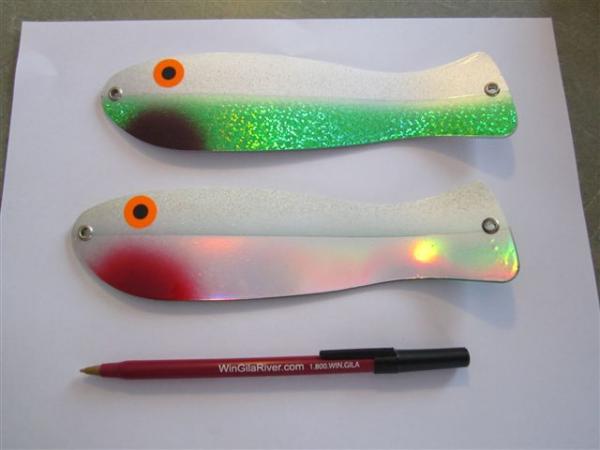 That black and pink ( magenta shad ) is a HOT steelie spoon!!
 -
Most productive mehtod of running flahser/fly combo
Big Dave replied to Draggin The Line's topic in Tackle and Techniques
Might not be stiff enough to give the fly the kick it needs as the flasher spins -
The race starts at 3 See ya there
-
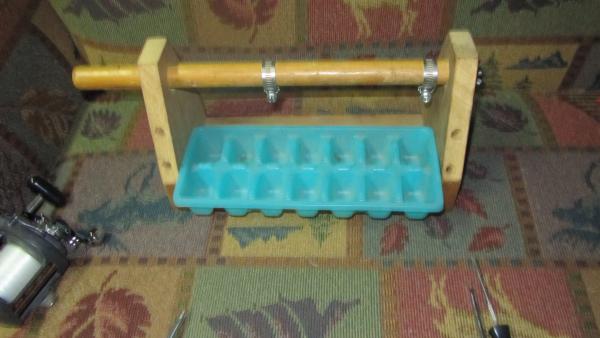 Thanks guys !! This sure beats trying to hold the reel with one hand and the parts with the other. And the screws and tool with the thrid hand
 -
 eagle claw ls 374
 -
Most productive mehtod of running flahser/fly combo
Big Dave replied to Draggin The Line's topic in Tackle and Techniques
There is a vidio on the Fish Dr. site that shows how to do the snell and the two hook set up. fishdoctorcharters.com -
I posted pictures of the reel stand. With the reel in the stand , it frees up both hands . And you can use gravity to help hold things in place while you service your reel
-
This is a handy stand that will hold the reel and allow you to put it on its side. That way gravity helps you load the parts back in. Which is good if your fingers are as stiff as mine are. Its made with an ice cube tray and some scrap pine and a $1.50 worth of hardware. I got it from the old Sarep newsletter. We made them with the cubscouts too. Its pretty easy to make . You cut the bottom the length of the ice cube tray. The two ends are cut and nailed together with finish nails. This lets you drill the hole for the broom stick. The trick is to drill a 1/4 " hole through first, than use a spade bit that fits your broom stick to drill through the first side and part way through the second. Put the broom stick through the end pieces to line them up and use sheetrock screws , screw them on. Use your 1/4" drill to mark the center of the broomstick , Then drill a smaller pilot hole for the stud. A couple of hose clamps and your all set. The wing nut lets you tighten the stick to hold the reel in place at the angle you want. It pulls the stick into the half drilled hole in the one end. The ice cube tray holds the parts in order that you take them off. And hopefully you don't have extra parts when done. Ice cube tray 1/4" wingnut 1/4" fender washer 1/4" stud (bolt thread on one end and wood screw on the other) 2 hose clamps 4 sheetrock screws scrap pine. The pine is cut to fit the tray , the width is what you have kicking around (mine was 6")
-
There is a reel easy stand you can make to stop this from happening. We made them with the cub scout den I had. Will try to post pictures tommarrow.
-
There should be Walleye gear here too !!
-
Big THANKS to Joe and Tim and all the LOTSA crew for the great weekend!!! Pencil me in for next year.
-
until