

lrg355
-
Posts
781 -
Joined
-
Last visited
Content Type
Profiles
Forums
Events
Gallery
Store
Everything posted by lrg355
-
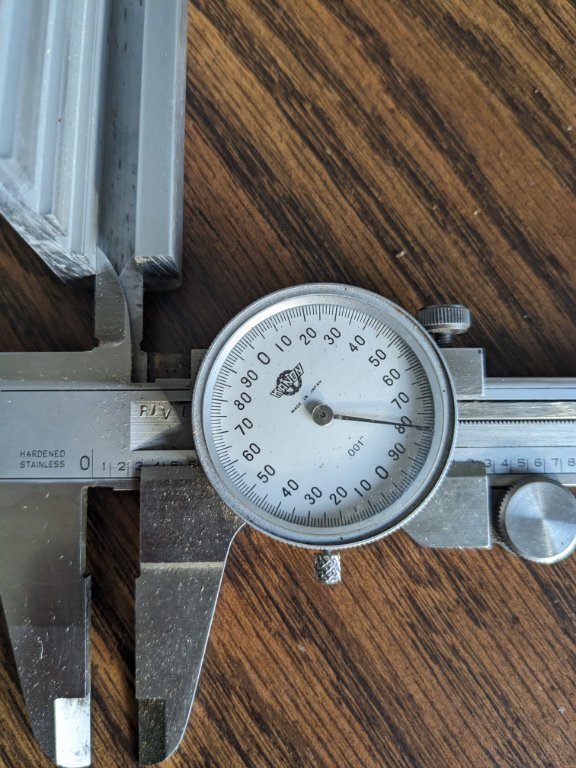 Actual inside clearance is .280 x 3.070. so a 1/4 thick by 3 in wide plate is good.
 -
I occasionally pick one up while fishing for browns in Apr and May but it is only one or two per season. I would think you would be much better off fishing the bays and estuaries for walleye.
-
My flea solution. Go to Wal Mart and get 50 lb test Shakespeare line. It is large enough diameter that the fleas cannot grab. It is very inexpensive and never has an breakage problems. Put on 200 or so feet than tie on 20 feet or so of 25 lb test Big Game. Use knots that won't have problems thru eyes and levelwind guide on both ends of the 50 lb test. The 50 will be in the vertical position of the downrigger setup and resist the fleas. Not many fleas will be able to grab horizontal running 25 Big Game on the horizontal position just after the release. Been doing this for 20 years with not much flea problems.
-
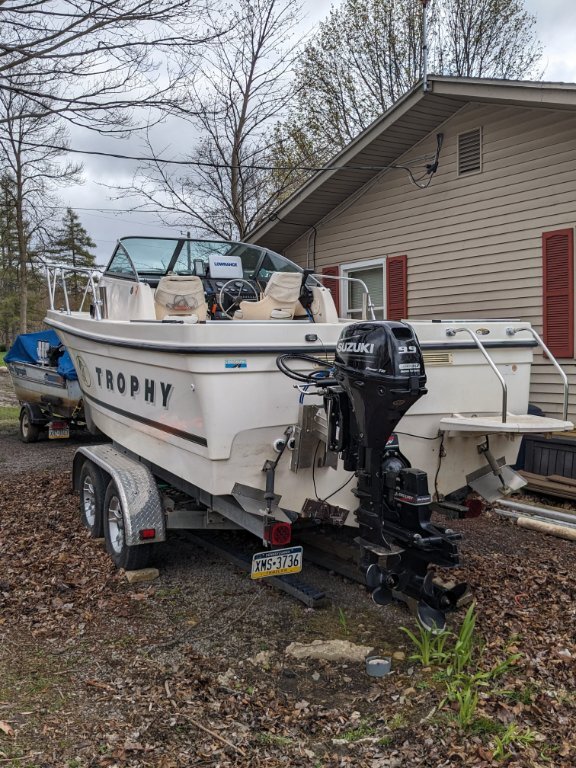
 My 2021 Suzuki 9.9 came with a 4 blade prop.
 -
 Can add other pictures of helm etc, next week. Not at camp till then.
 -
I took a different approach than usual. I had a very little used Lowrance outboard pilot hydraulic from a previous boat so that saved me about $1200. It is integrated into my existing HDS12 gen 2 Touch. I used a Vevor hydraulic steering setup ($350) on my 9.9 Suzuki. The setup only controls the Suzuki and not the main Mercruiser 4.3. I find it very responsive since it is not turning the out drive, just the trolling motor. I can trim up the Merc all the way when trolling if necessary. I mounted the helm in a convenient place on the lower dash and put a 4 in crank handle on it to turn the kicker manually. I have a low water situation at my cottage at times which is problematic for using main power to get to my dock. I can trim Merc up fully and get to dock with Suzuki manually since I have it set up such that the skeg doesn't go below lowest part of hull. Very happy with setup.
-
Always ask for a picture of the item in a specific way, like sitting on today's newspaper. Scammers often try to sell items they don't have but are using pictures from somebody else's advertisement.
-
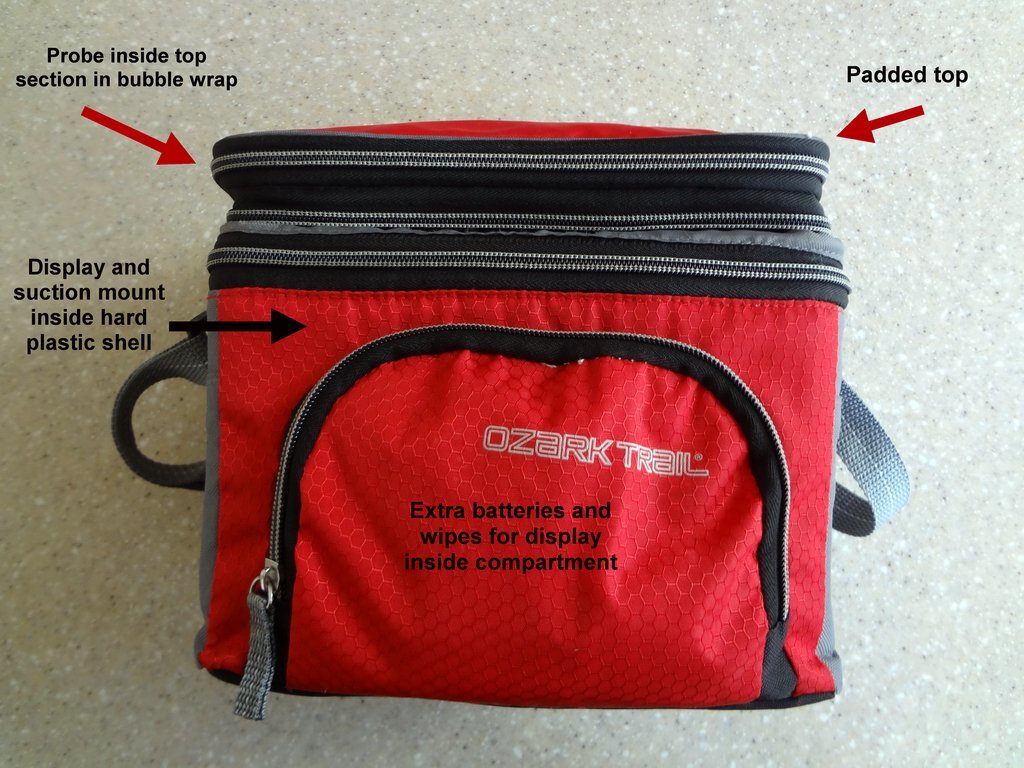 I had the same problem on my X4D at the end of last year. I was going to try the probe on a friend's boat to verify it is the probe this spring. 2 years old. Obviously there is a problem with these.
 -
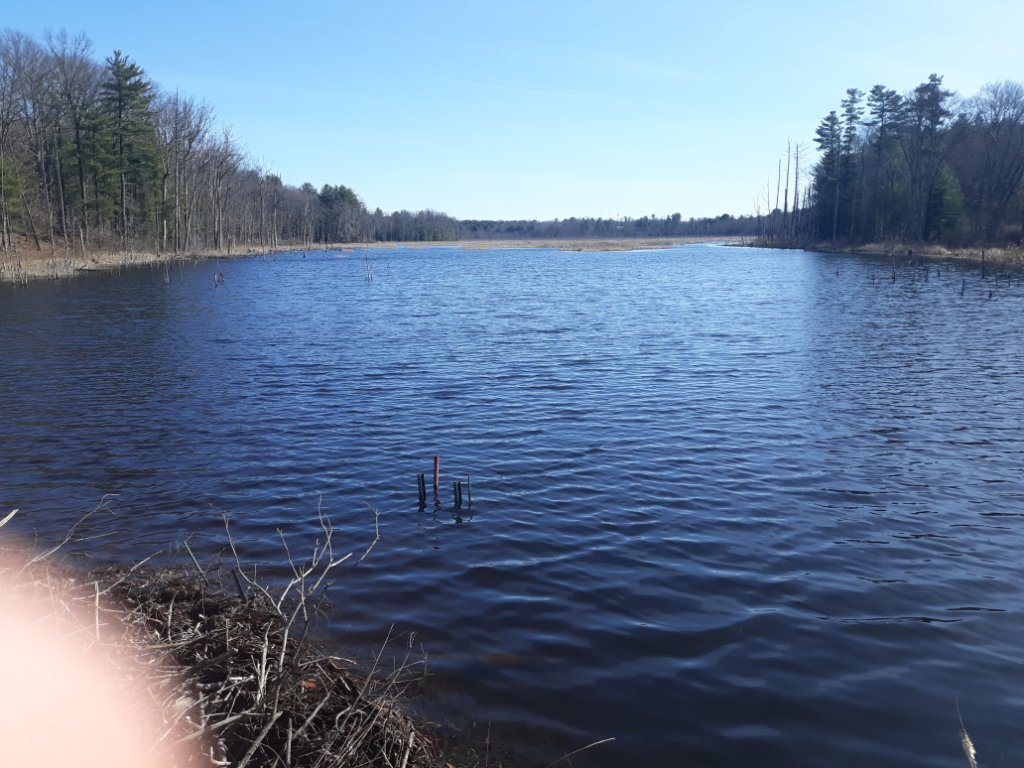 This is my "pond" built by beavers. Is a few hundred yards wide x about 1/2 mile long. About 8 ft deep just back from the dam. I own from the beaver dam back about 650 ft to the end of my property line. Has bass, pickerel and all panfish. Nice catfish and probably the best duck hunting in the county
 -
-
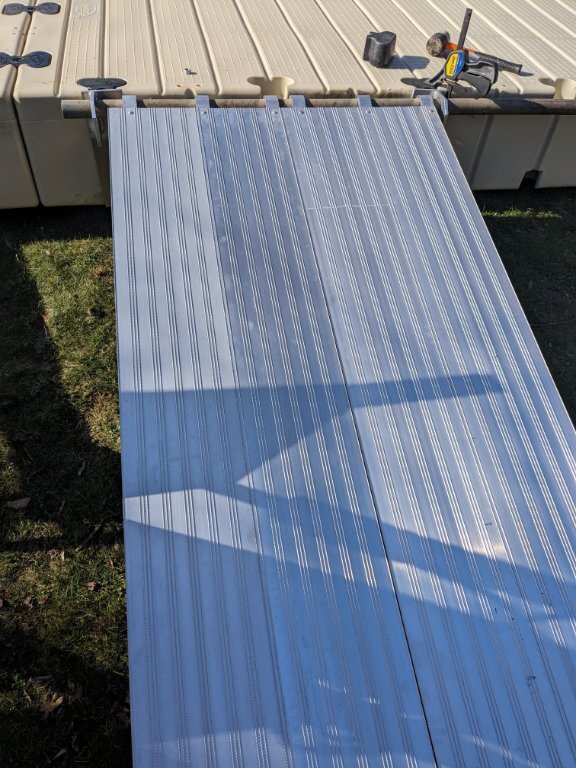 Just set up first set with my homemade brackets. Looks like a good setup.
 -
Come in various lengihs
-
Forgot to mention each plank weighs only 27 lbs
-
I have the EZ Docks at my camp on Sandy Pond. Prices are crazy. They wanted over $2k for a 10 ft plastic ramp. I decided to do something myself. Bought alum planks for scaffolding. 19 in wide x 7 ft long for $106 each. I have 2 side x side fo 38 in width. They have hooks on both ends for hanging between scaffolding pipe. Load rating is over 1000 lbs per section. They are knurled on the surface for anti-slip. Made my own pivot mounts. Out fishing now and will send pics and info later.
-
Lake Ontario Salmon School post thoughts 3/8/24
lrg355 replied to digitroll's topic in Open Lake Discussion
Ok, thank you -
Lake Ontario Salmon School post thoughts 3/8/24
lrg355 replied to digitroll's topic in Open Lake Discussion
More info please. When and where was it held and any info for 2025 would be appreciated. -
 Tough to find the proper one without paying
 -
That one is for 2005 which is for carburated models. Fuel injection came out about 2014. Probably most other items may be the same.
-
Ok, thank you. I always do all service myself. Only go to auto, Marine, etc dealers for warranty covered items.
-
You are welcome. Another good addition to that same motor that I did was a small digital tachometer/hourmeter. They are available online for about $20. Run on a watch type round battery and display hours when the motor is not running and RPM when running. Good for maintenance scheduling, etc. FYI, the flashing light alarm on the Suzuki is going to go off at 20hrs for the first oil change and every 100 hrs after that. Of course I don't usually read manuals thoroughly so I was worried and surprised at the first alarm. Manual explained how to reset it. Good fishing!
-
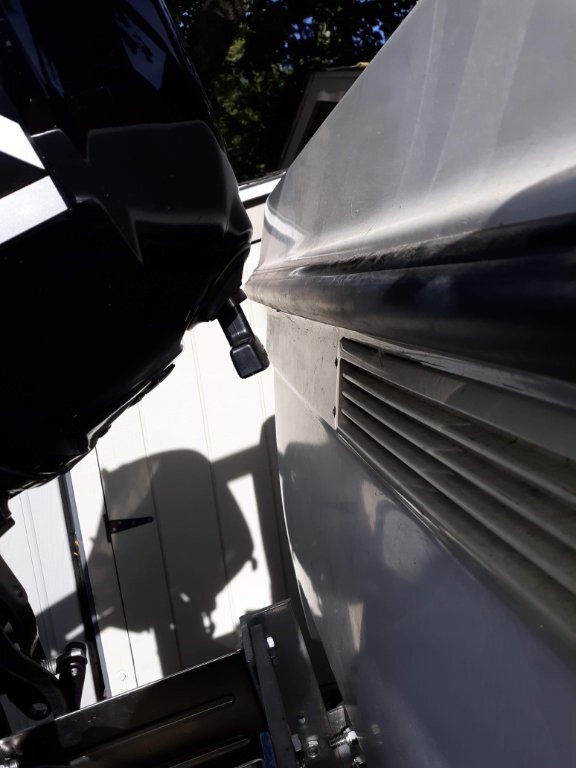
The simple solution is to do what I did. Clamp only the alum plate onto the transom bracket in the proper position. Use the largest transfer punch you can fit snugly into the holes and slots on the transom bracket. That will be a touch over 5/16 or 8mm, probably 21/64 (.328). Make a good center punch mark in the two top holes and in the middle of the slots on the bottom. Take the plate out and start your holes with a center drill. After a good start, drill thru with a F drill, that is a letter drill bit (.257) which is the tap drill for 5/26-18 thread. A drill press works better than by hand. Tap the 4 holes in the plate for 5/16-18. Obtain bolts that are as long as the thickness of the plate + the thickness of the transom mount + the thickness of the washers you will use minus about 1/32. Cut the bolt length down if necessary. 1/2 inch of coarse thread in alum is plenty of strength. Put you complete mount together and on the boat. Put the motor on last, clamp the motor just snug after aligning the bolt holes. Put the bolts in with a bit of blue Locktite and you will be a happy fisherman. Don't use red Locktite , that will be hard to remove. My setup has been on 2 seasons and nothing came loose yet. The F drillbit, tap, center drill and transfer punch are available from McMaster. A 1/4 inch hole instead of an F drill will be ok in alum just use plenty of oil and go slow when tapping. The brown trout will be waiting for you to get done. The way you are describing the transom bracket attachment to the alum plate would require the alum plate be attached to the transom bracket before the alum plate is attached to the Panther plastic plate. That will work as long as you can get the new long bolts in and thru both plates with the motor on. blockquote widget
-
The way you are describing the transom bracket attachment to the alum plate would require the alum plate be attached to the transom bracket before the alum plate is attached to the Panther plastic plate. That will work as long as you can get the new long bolts in and thru both plates with the motor on.
-
Doing work like that involves somewhat accurate drilling by hand. Check out a set of transfer punches from McMaster Carr. They will "center punch" accurately to allow hole to hole accuracy. As I recall, the hole size on the Suzuki is for 8mm bolts. 5/16 transfer punch will do a nice job on that.
-
No need to countersink the holes in the alum plate because the bolt heads will miss all parts of the Suzuki mount.
-
Some of the pictures I sent were taken before I was completely finished. The actual proper length torx head type security bolts I used were not yet on it. Hardware was ordered from McMaster Carr Supply Co.
